Help Center / Products you embed
Application Flow: what your customers fill in
Application Flow is the application your customers complete. This page shows every screen and what it asks for.
8 min read · Updated November 10, 2026
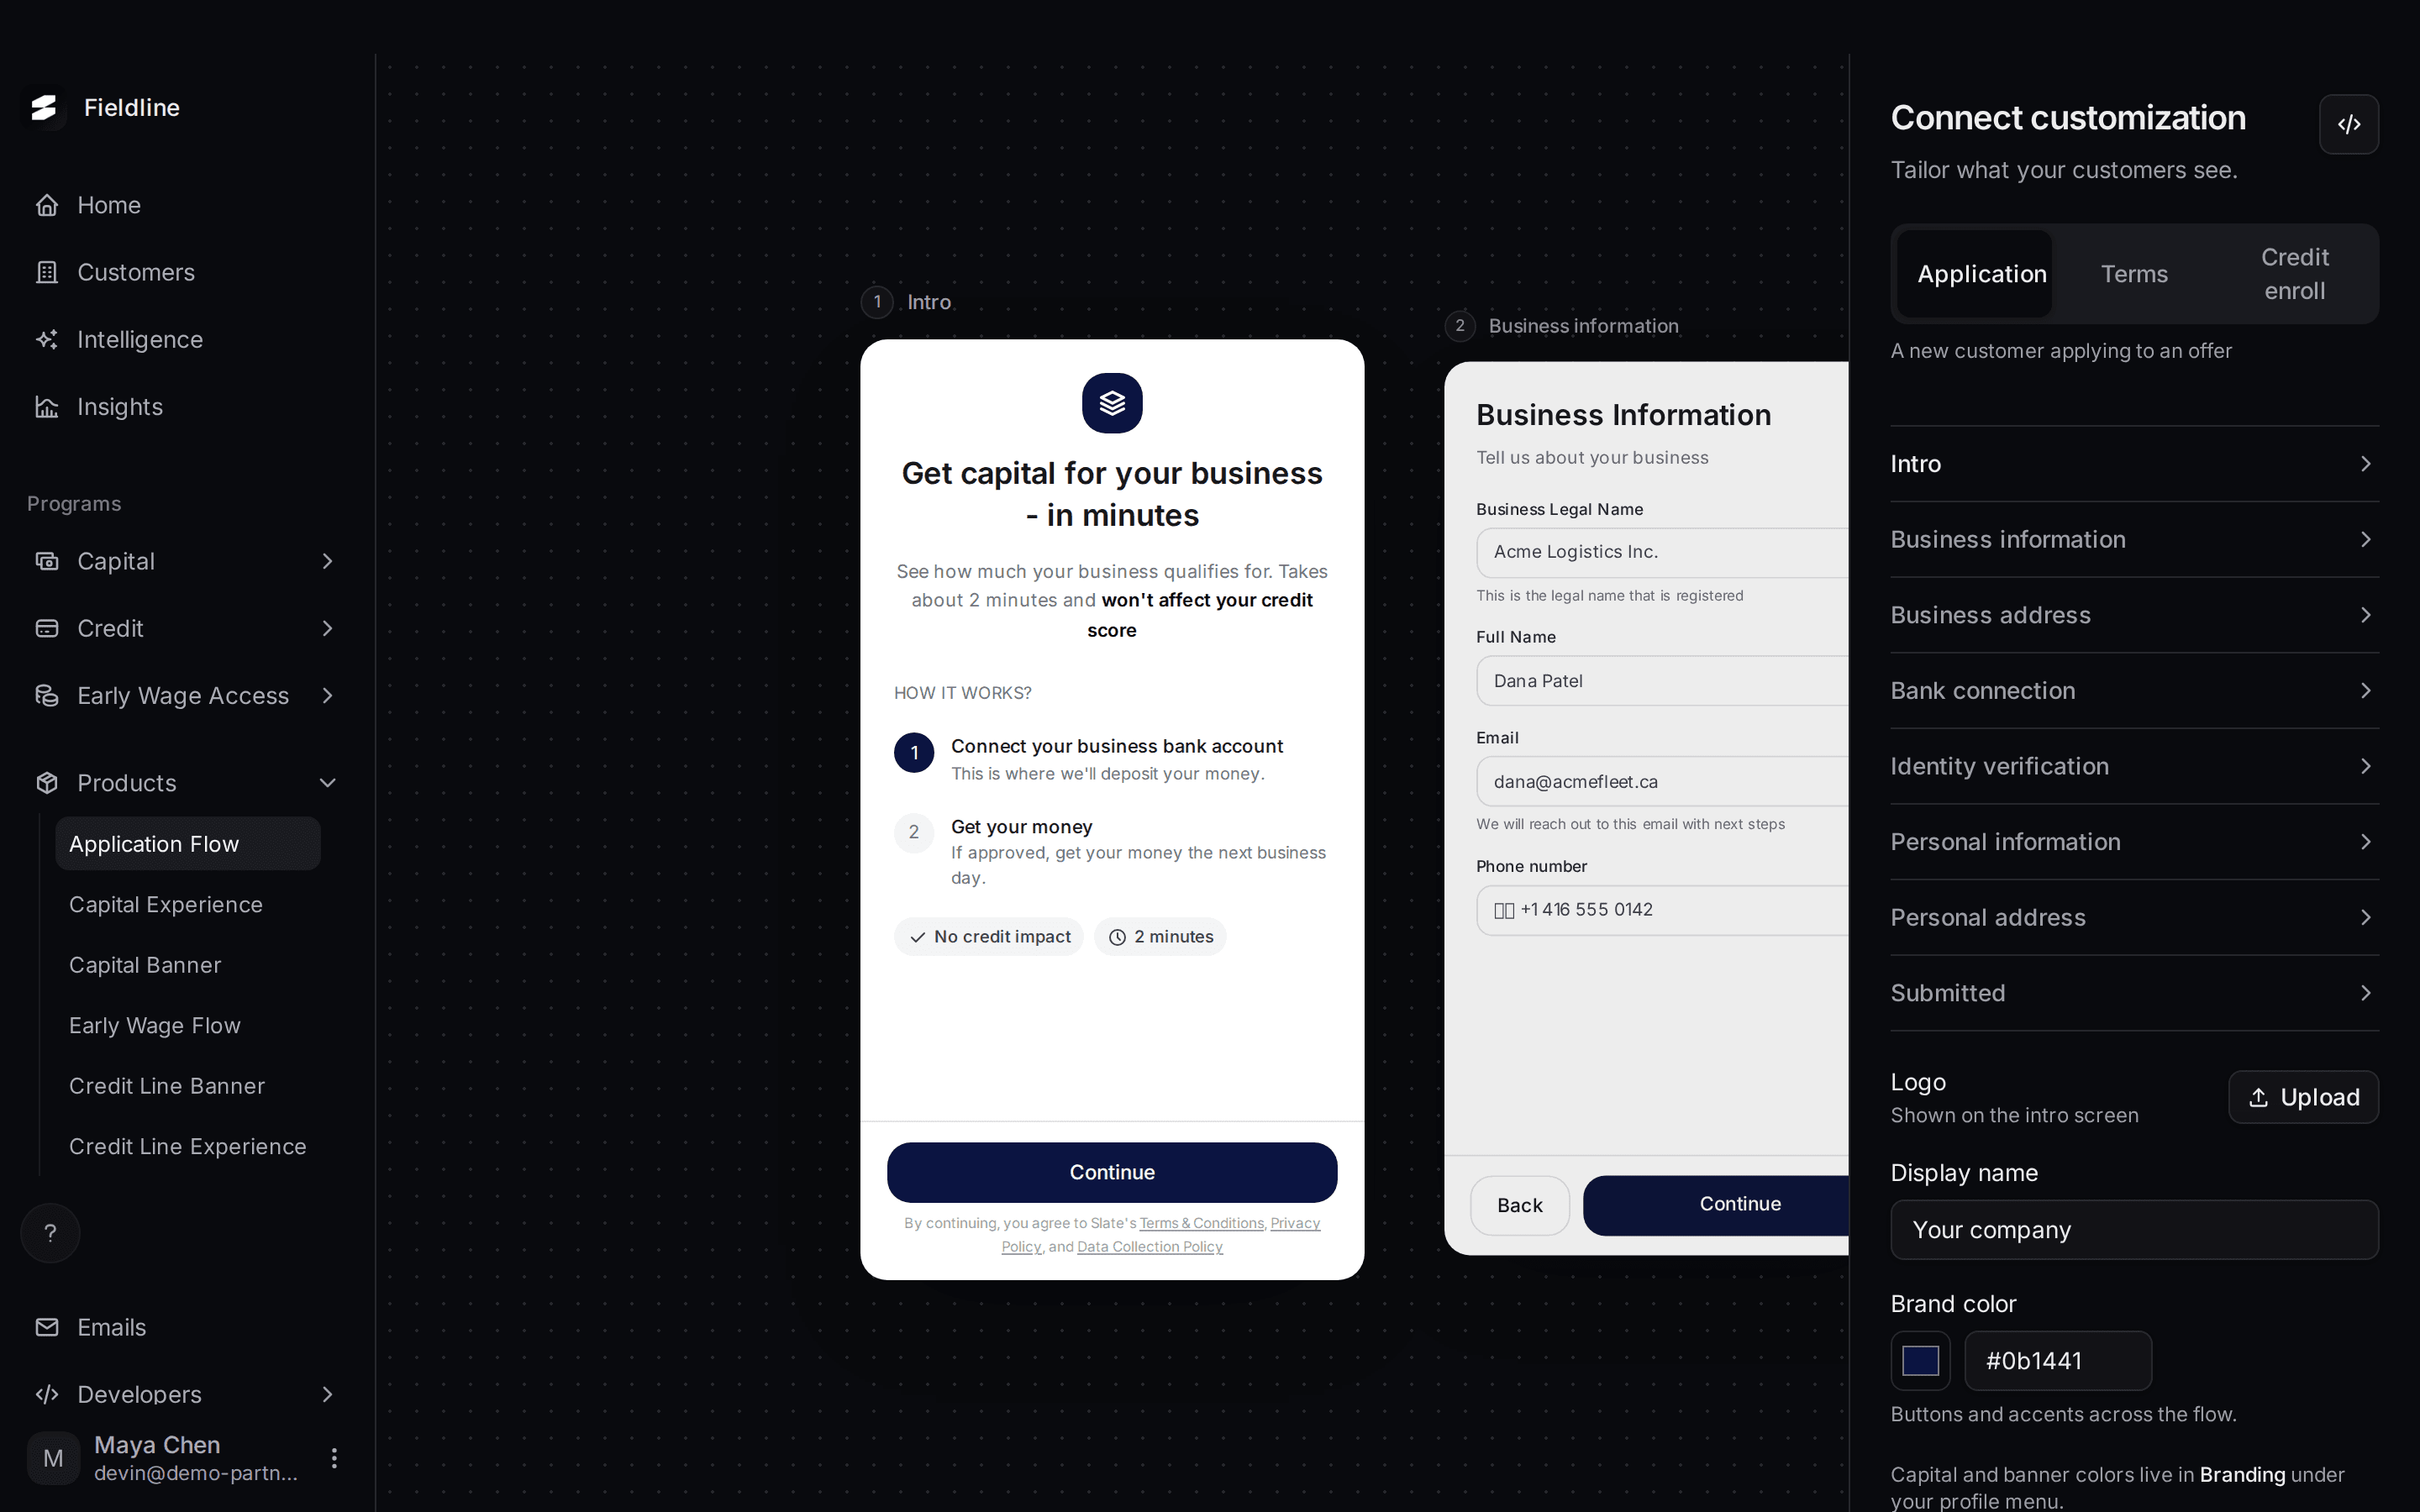
Application Flow is the application your customers complete to take an offer. You can send it as a link with no developer, or open it from a button in your own product. In the dashboard you can preview every screen and set your logo, name and brand colour.
You'll find it under Products > Application Flow.
Open Application Flow
Select Application Flow
Select Products in the menu on the left, then Application Flow.
Choose a version
At the top of the right-hand column, pick Application, Terms or Credit enroll. Each version has its own set of screens. The page only shows the versions that apply to your account.
Select a screen
Select a screen name in the list to bring it to the middle of the board. You can also select a screen that peeks in at the side.
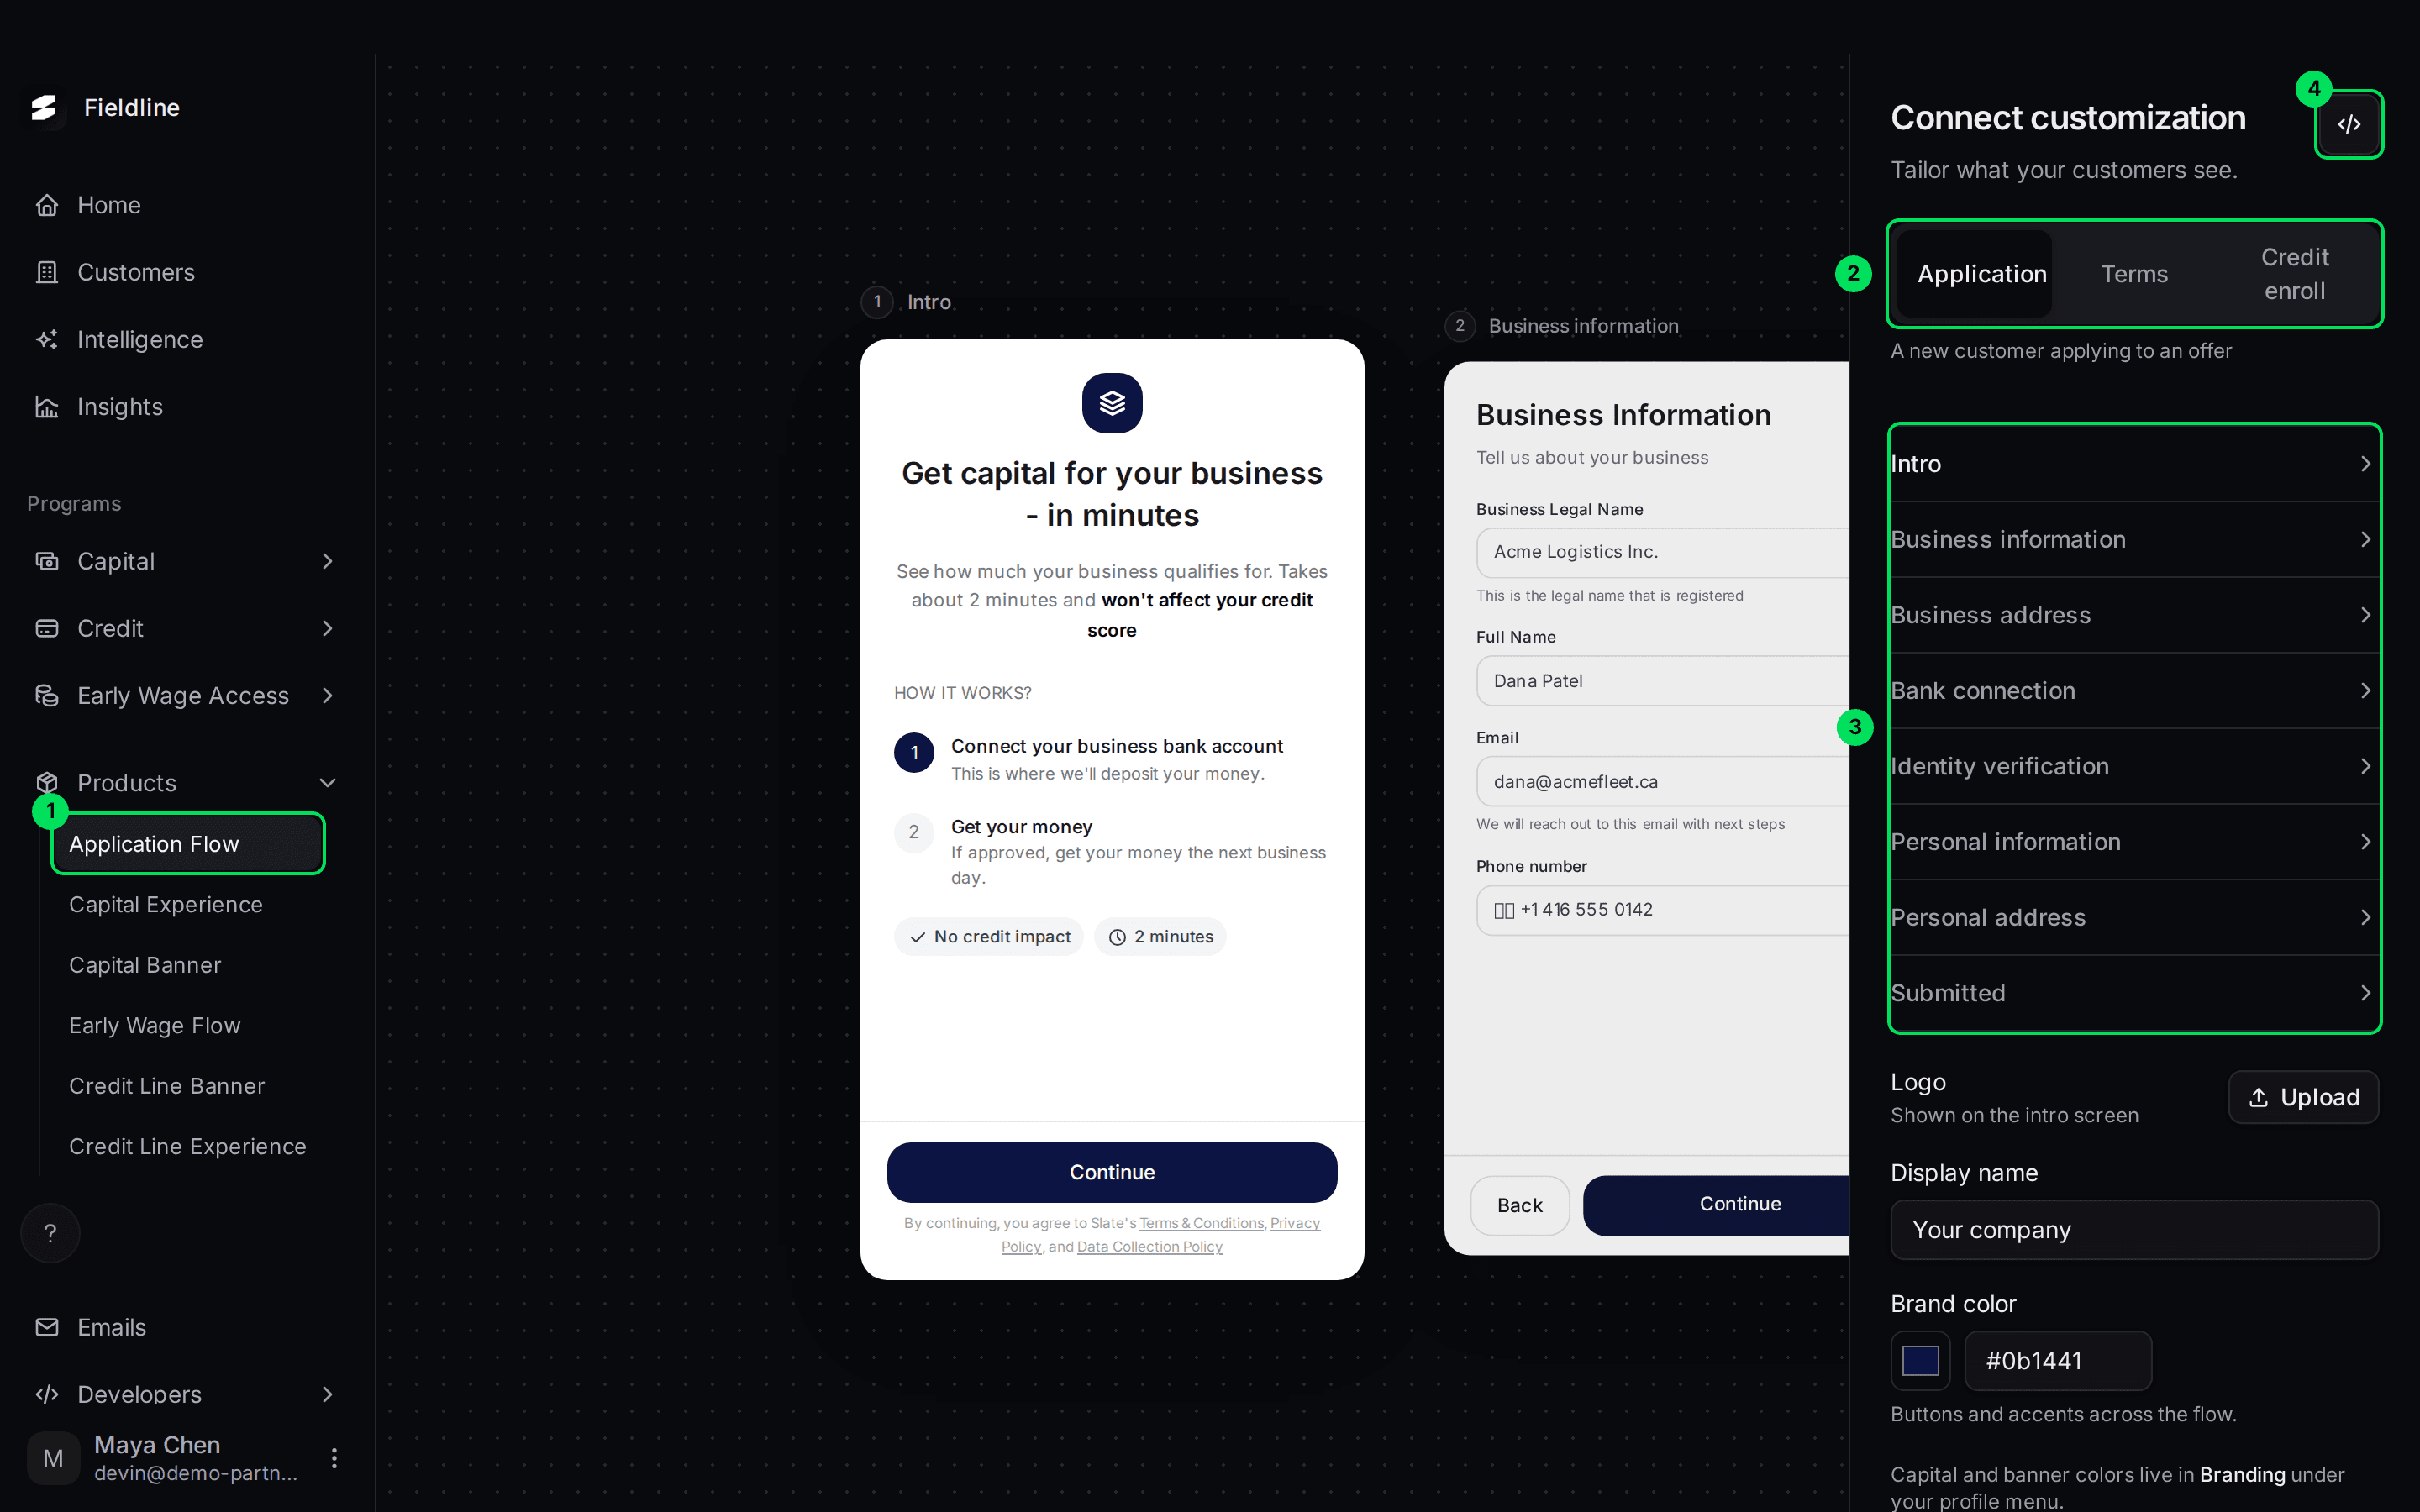
- Application Flow in the Products menu.
- The three versions: Application, Terms and Credit enroll.
- The list of screens. Select one to preview it.
- The Embed code button. See How the products you embed work.
The Application version
This is the application for a new customer who is applying for an offer. The board shows eight screens.
1. Intro
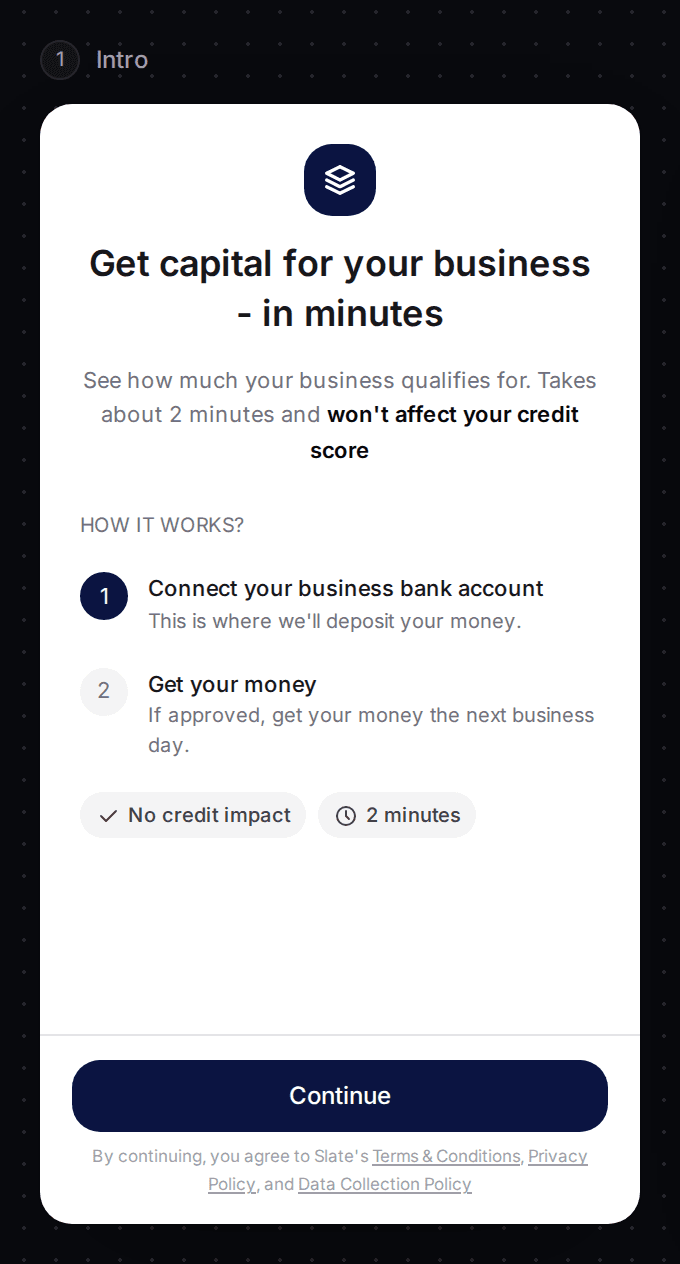
The welcome screen. It says the application takes about 2 minutes and won't affect the customer's credit score, and shows two short steps: connect a bank account, then get the money. Two chips repeat the promises: No credit impact and 2 minutes. The customer selects Continue to start.
2. Business information
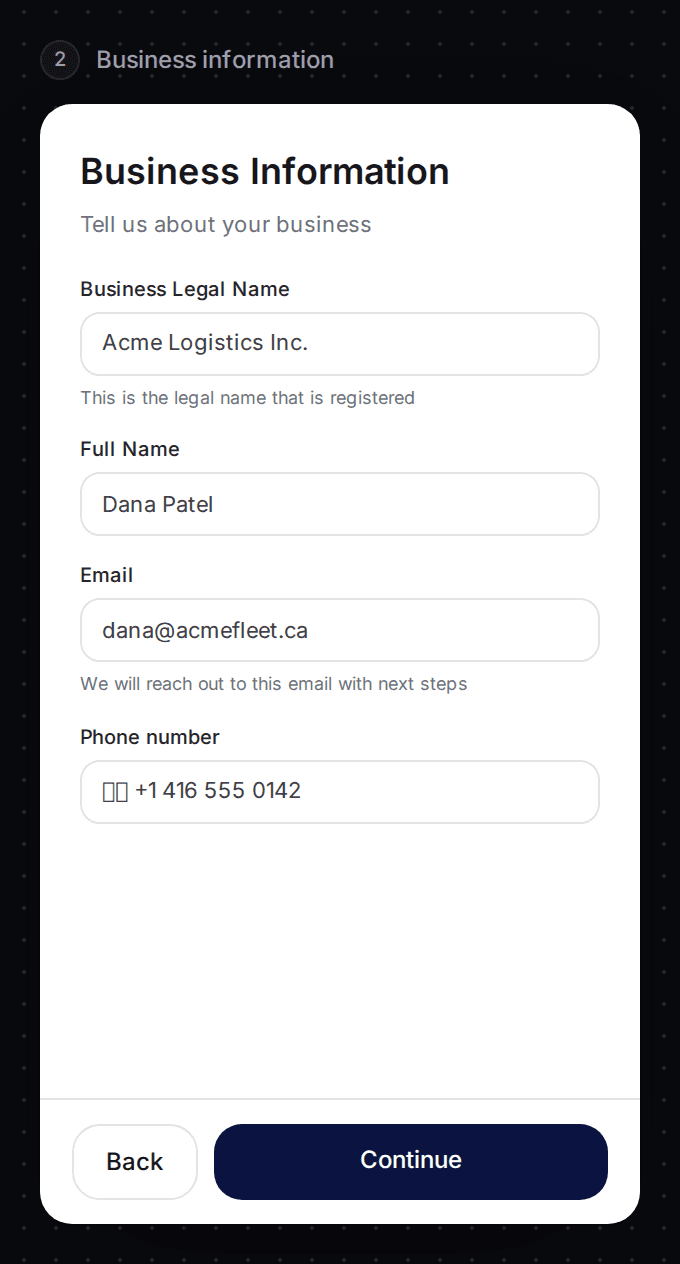
The customer confirms the business legal name, their full name, email and phone number. Anything you already sent Slate is filled in.
3. Business address
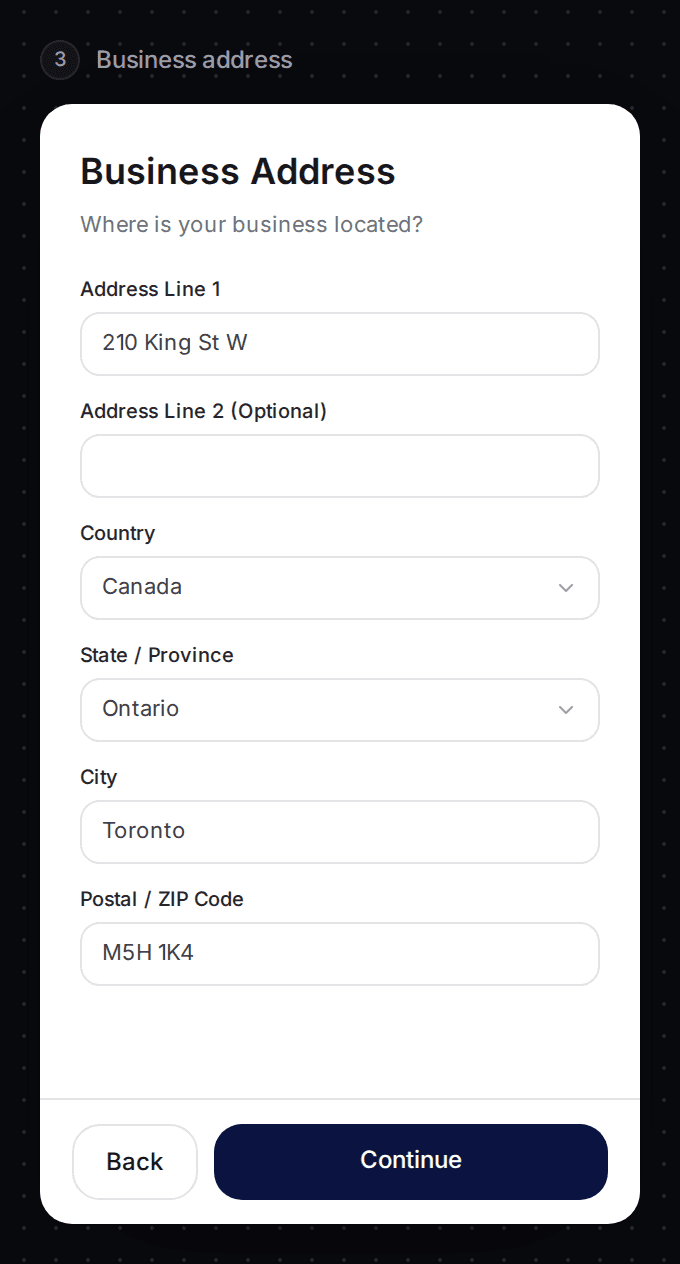
The business street address, city, province or state, and postal or ZIP code. The country is Canada or United States.
4. Bank connection
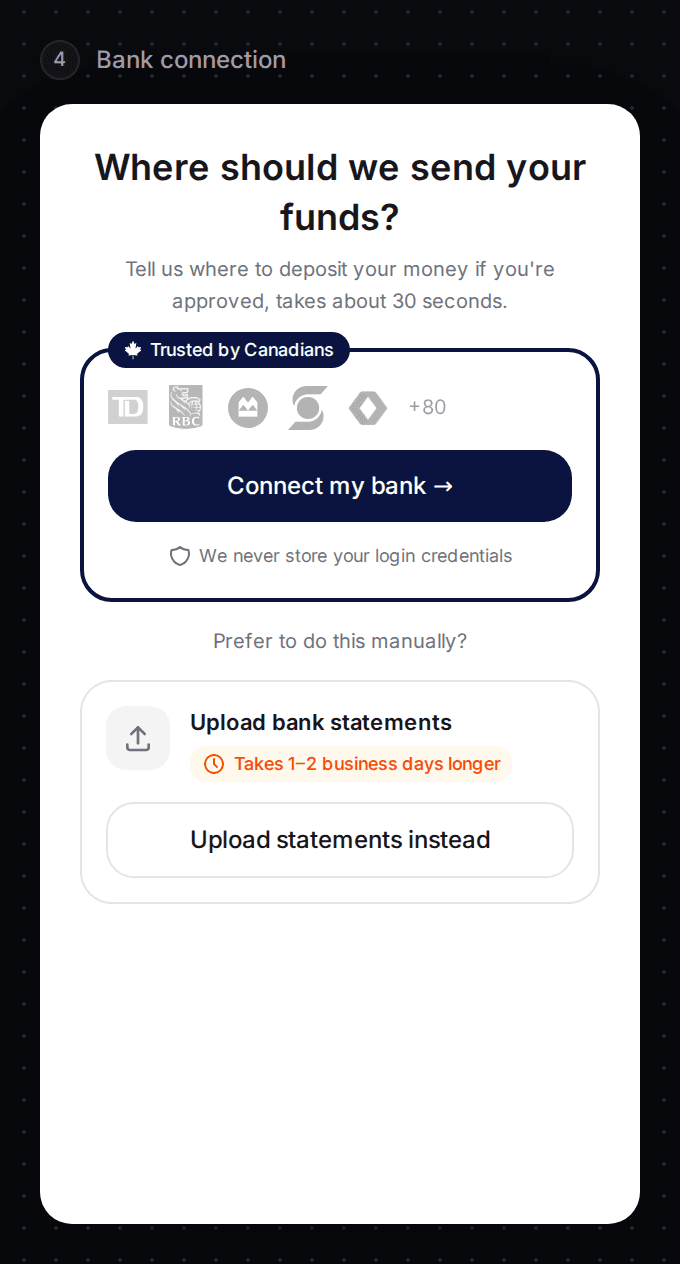
"Where should we send your funds?" The customer selects Connect my bank and signs in to their bank through a secure window. Slate never sees the bank password. Under it, Upload statements instead lets them upload bank statements. The screen warns that this takes 1-2 business days longer.
5. Identity verification
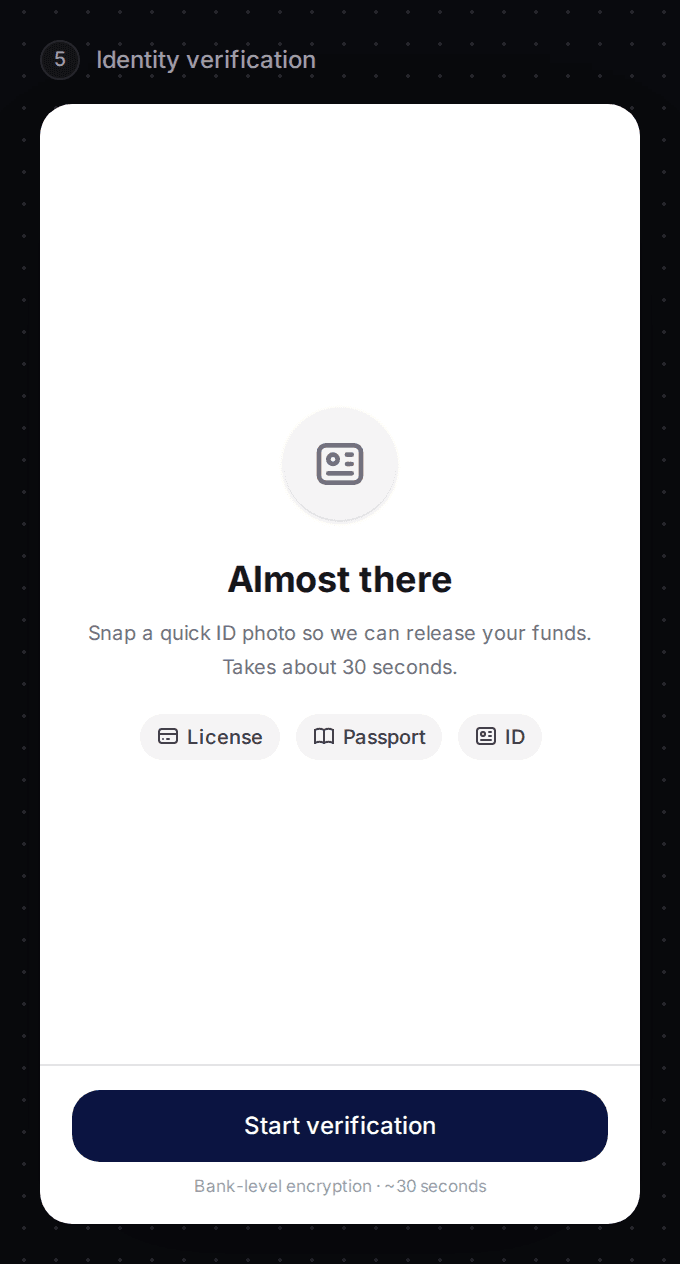
"Almost there." The customer takes a quick photo of a licence, passport or ID card with Start verification. It takes about 30 seconds.
6. Personal information
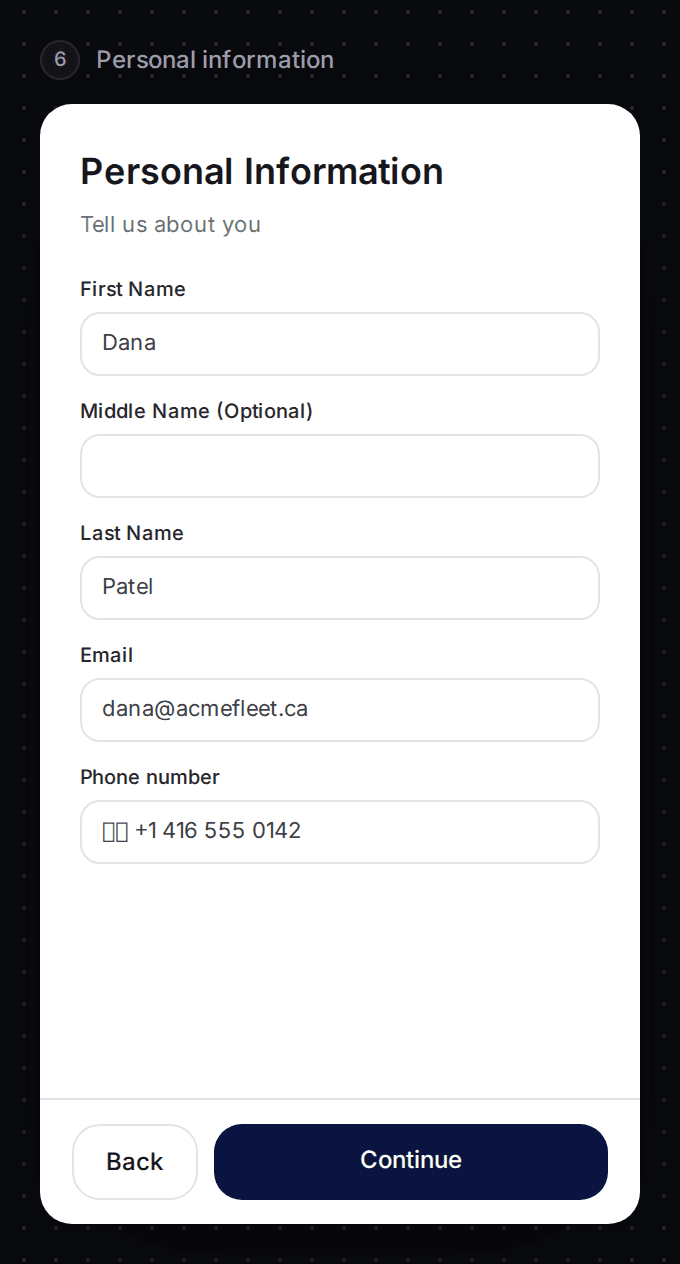
First name, last name, email and phone number for the person applying. This screen is for individual customers.
7. Personal address
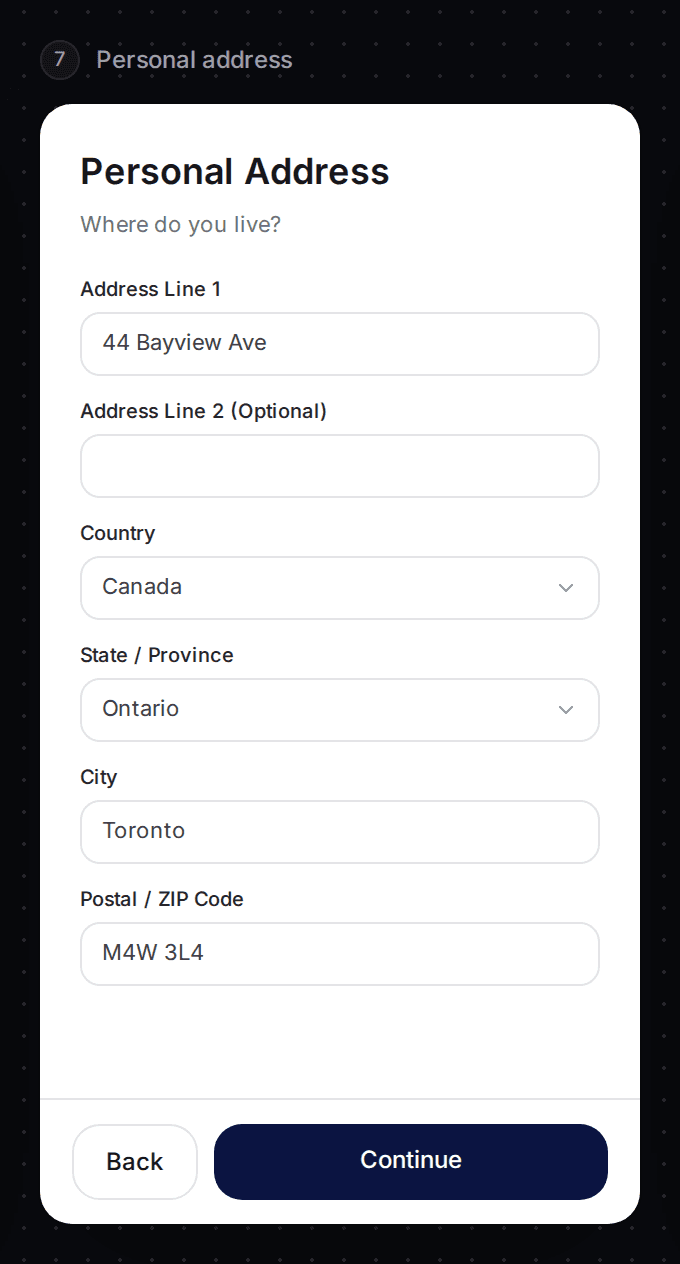
The home address of the person applying.
8. Submitted
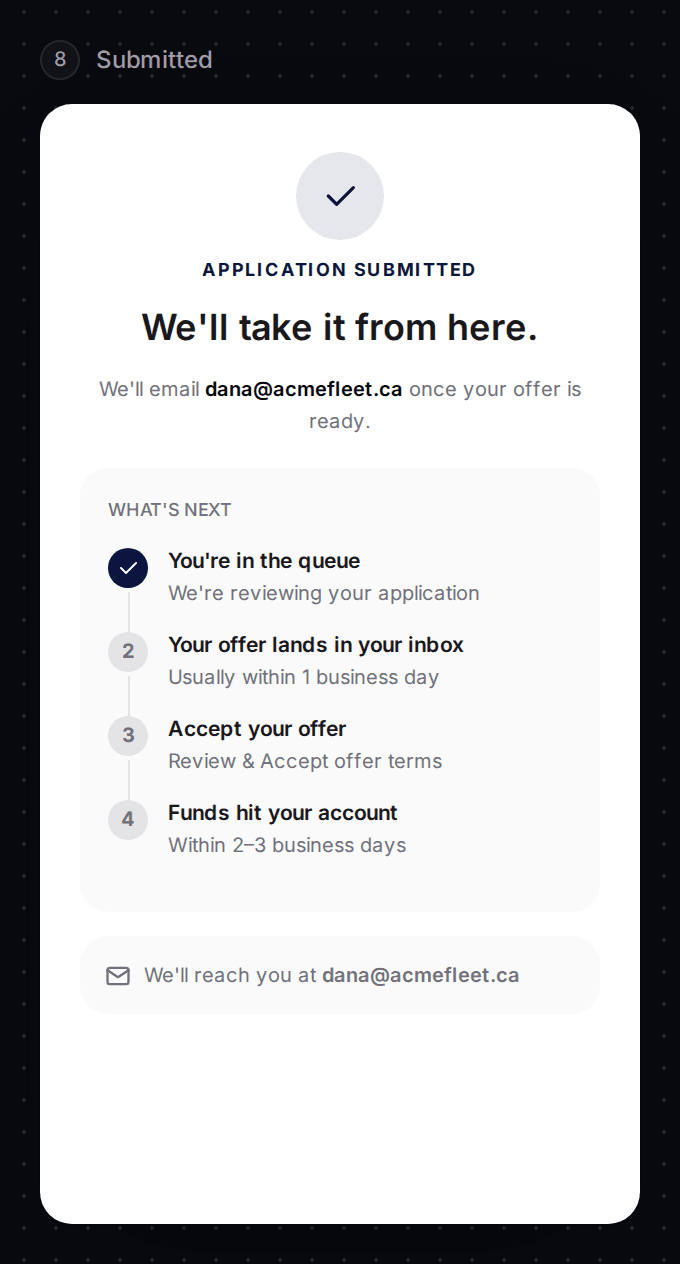
"We'll take it from here." It confirms the email address Slate will write to and lists what happens next: you're in the queue, the offer arrives by email, the customer accepts it, then the funds arrive.
The Terms version
This is for a customer who is already pre-approved and chooses how much to take and how long to pay it back. It has four screens.
1. How much today?
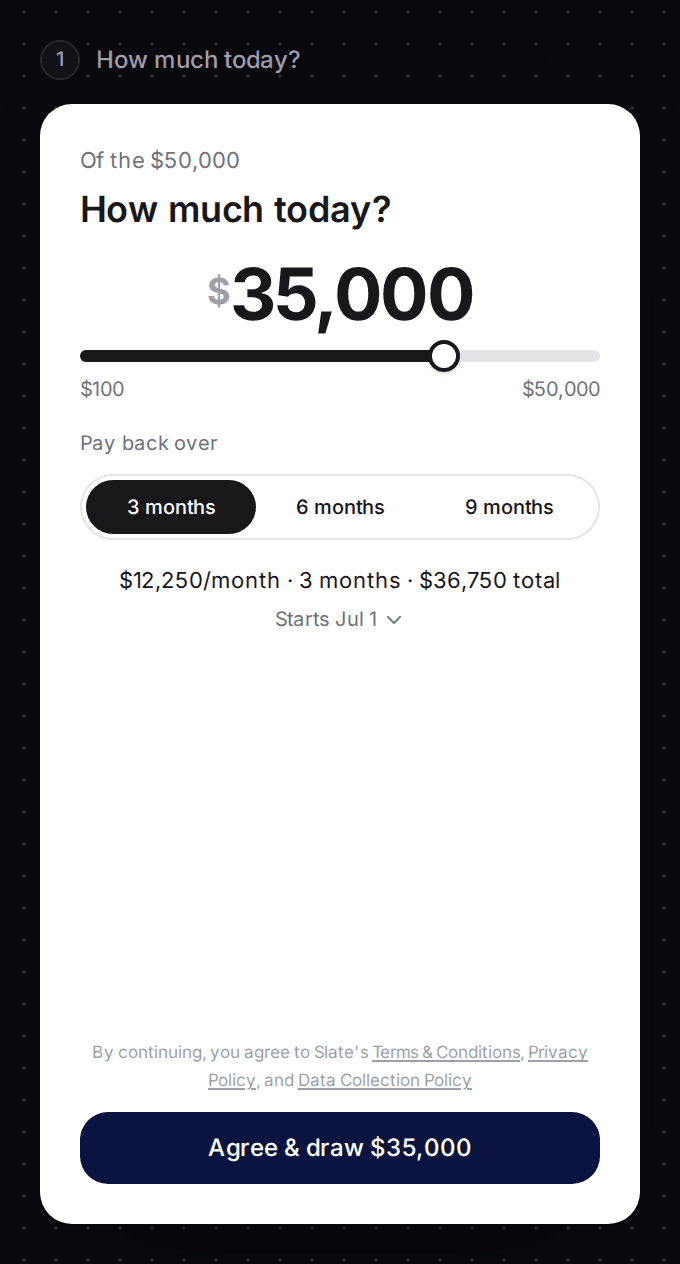
The customer picks an amount with the slider or by typing it. The most they can pick is the amount of the offer. They choose to pay back over 3 months, 6 months or 9 months, and see the monthly payment and the total. The button reads Agree & draw and the amount.
2. Bank connection
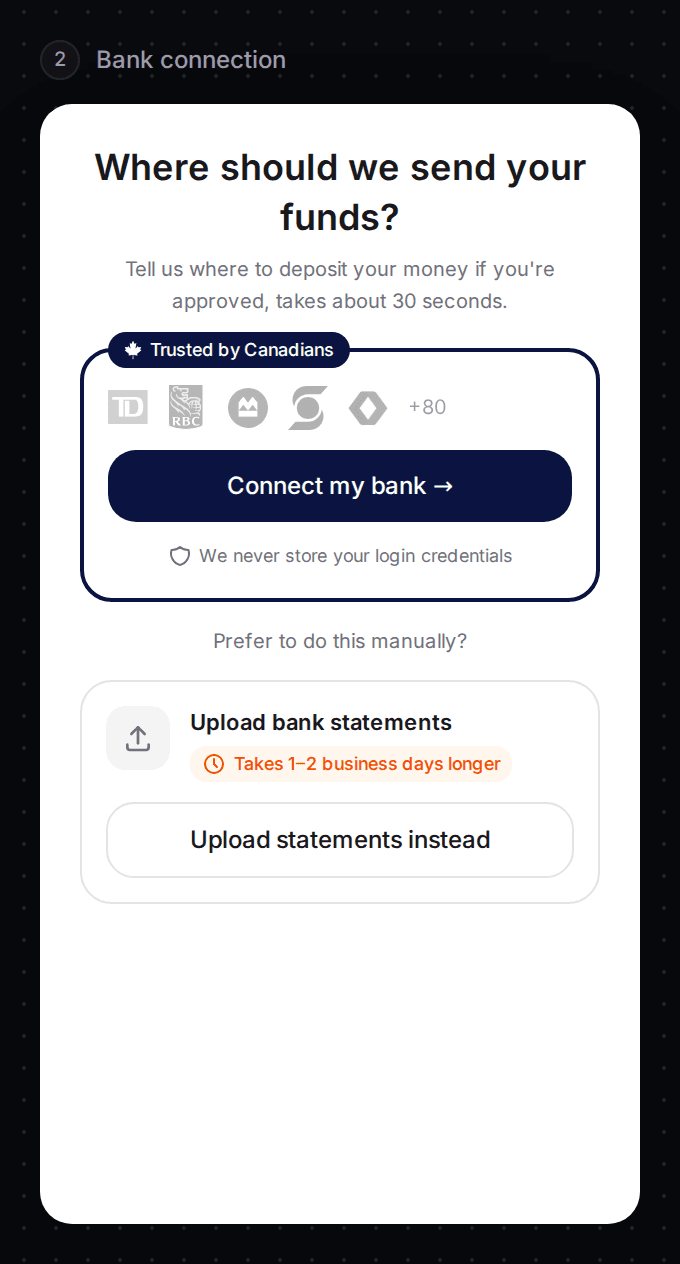
The same bank step as in the Application version.
3. Identity verification
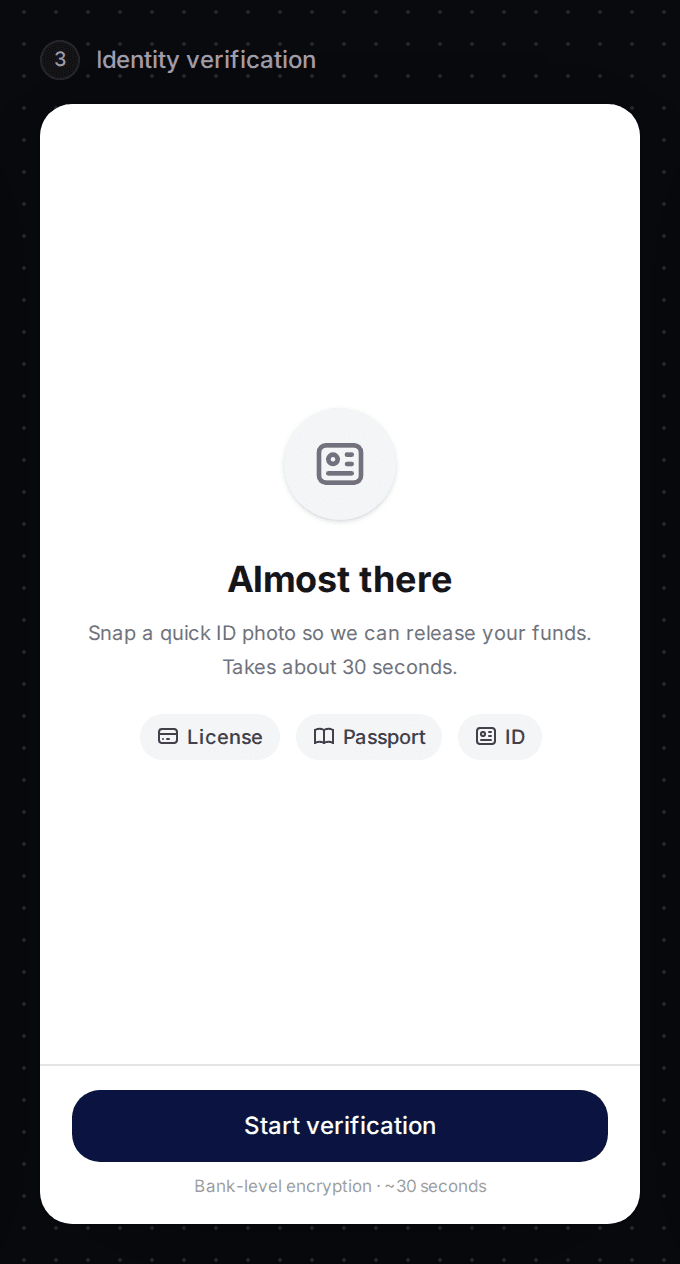
The same identity step.
4. Money on the way
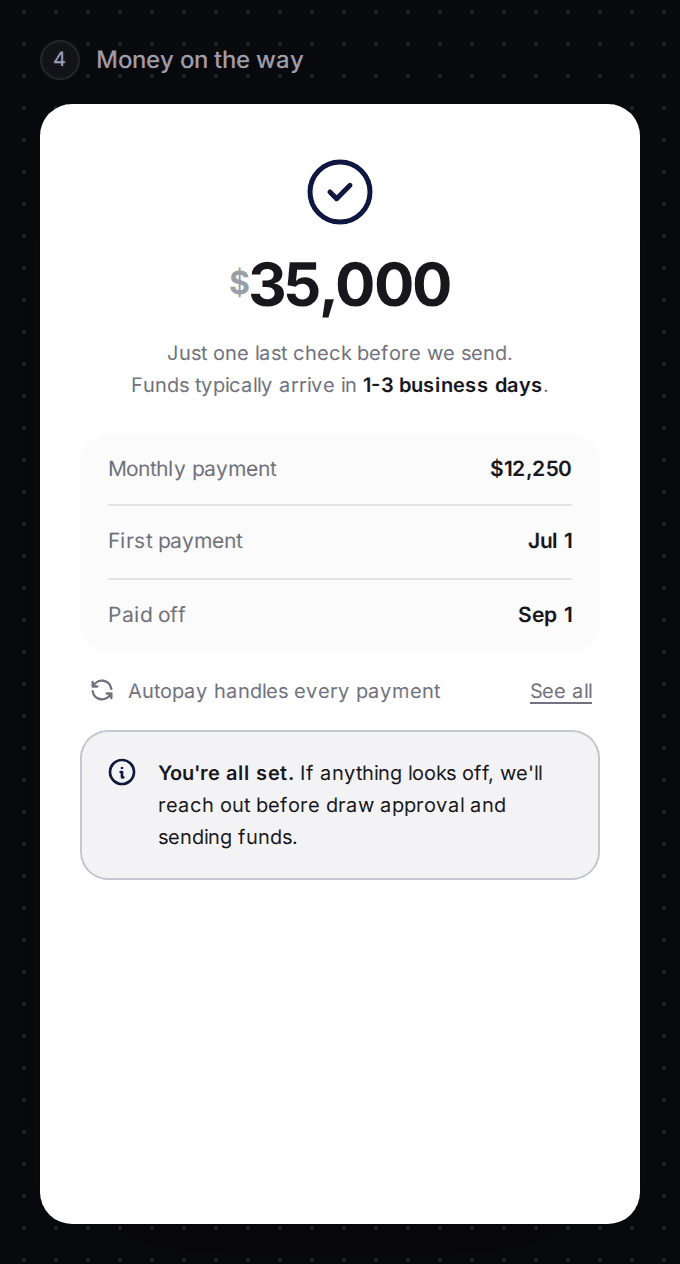
A summary with the monthly payment, the first payment date and the payoff date. It says autopay handles every payment and that Slate will reach out before sending funds only if something looks off.
The Credit enroll version
This is for a customer who is turning their card into a credit line. You only see it if your account has Credit. It has six screens.
1. Intro
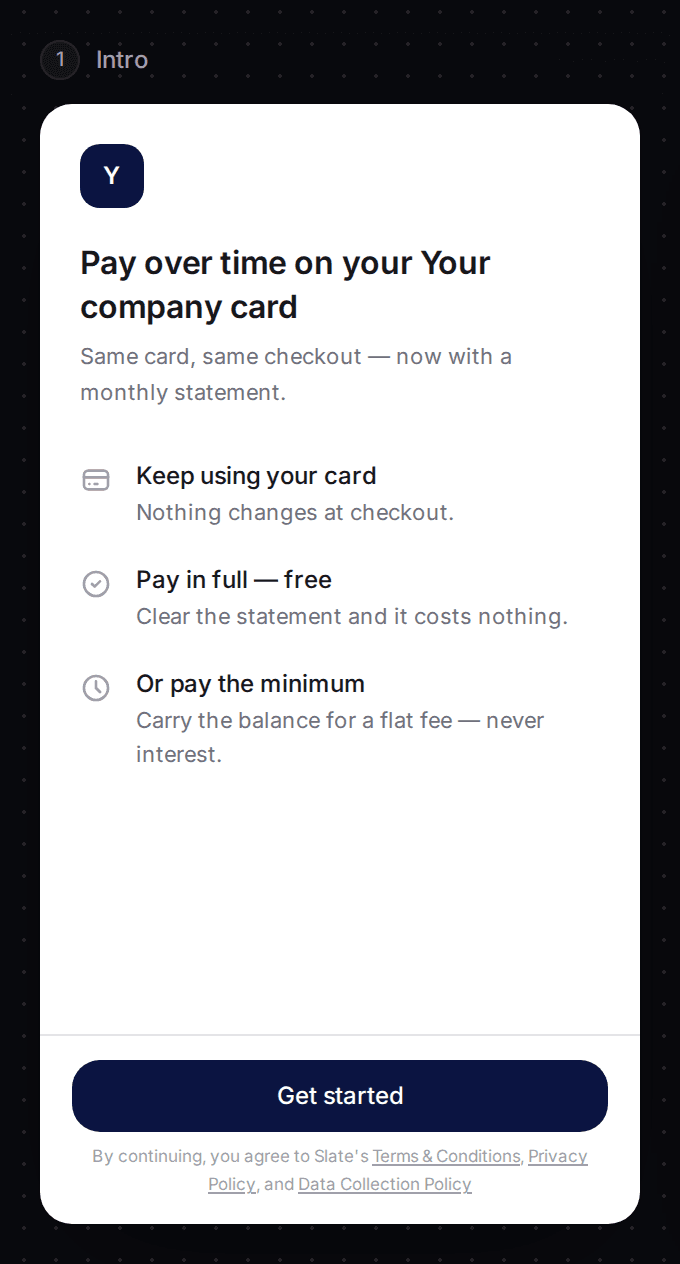
Explains the credit line in three short points: keep using your card, pay in full for free, or pay the minimum for a flat fee. The button is Get started.
2. Business information
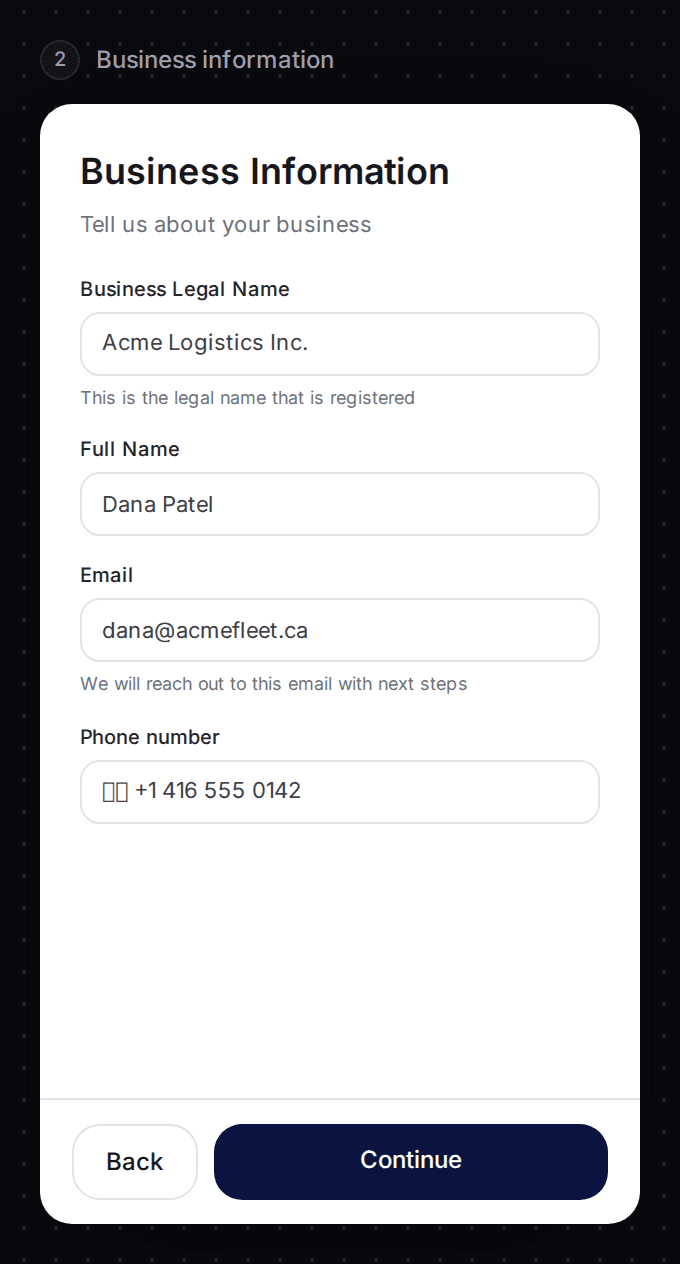
The same business details screen as above.
3. Business address
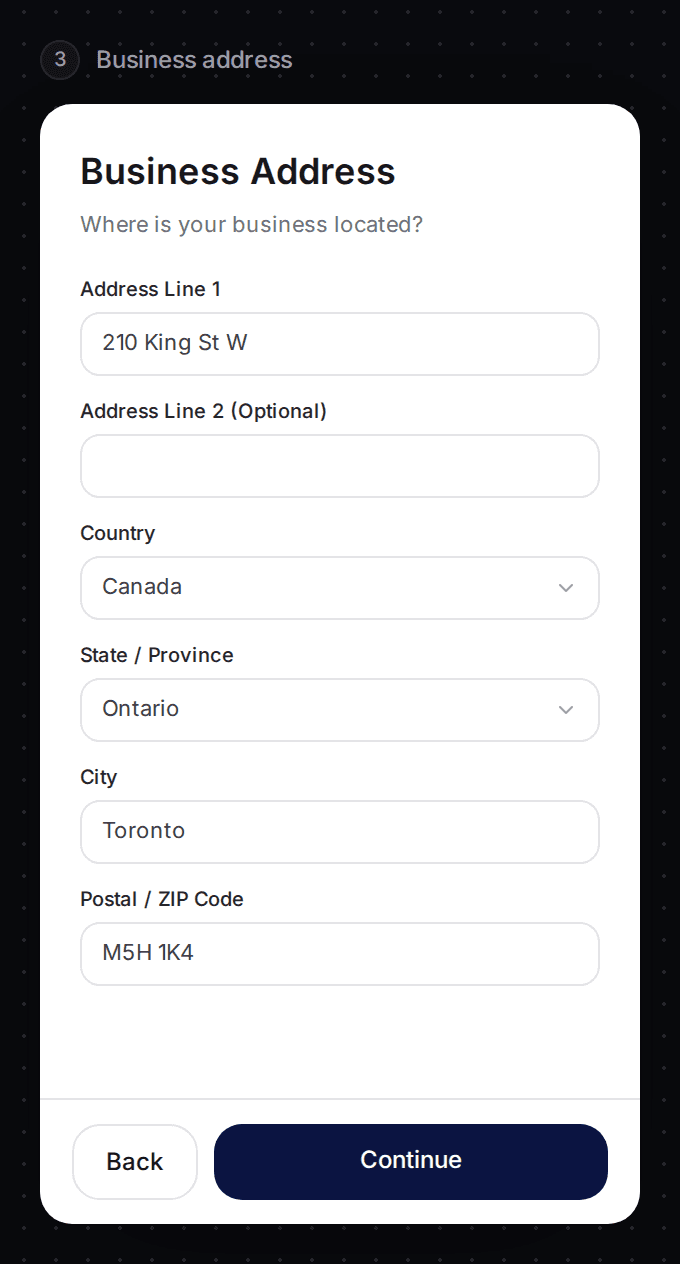
The same business address screen as above.
4. Bank connection
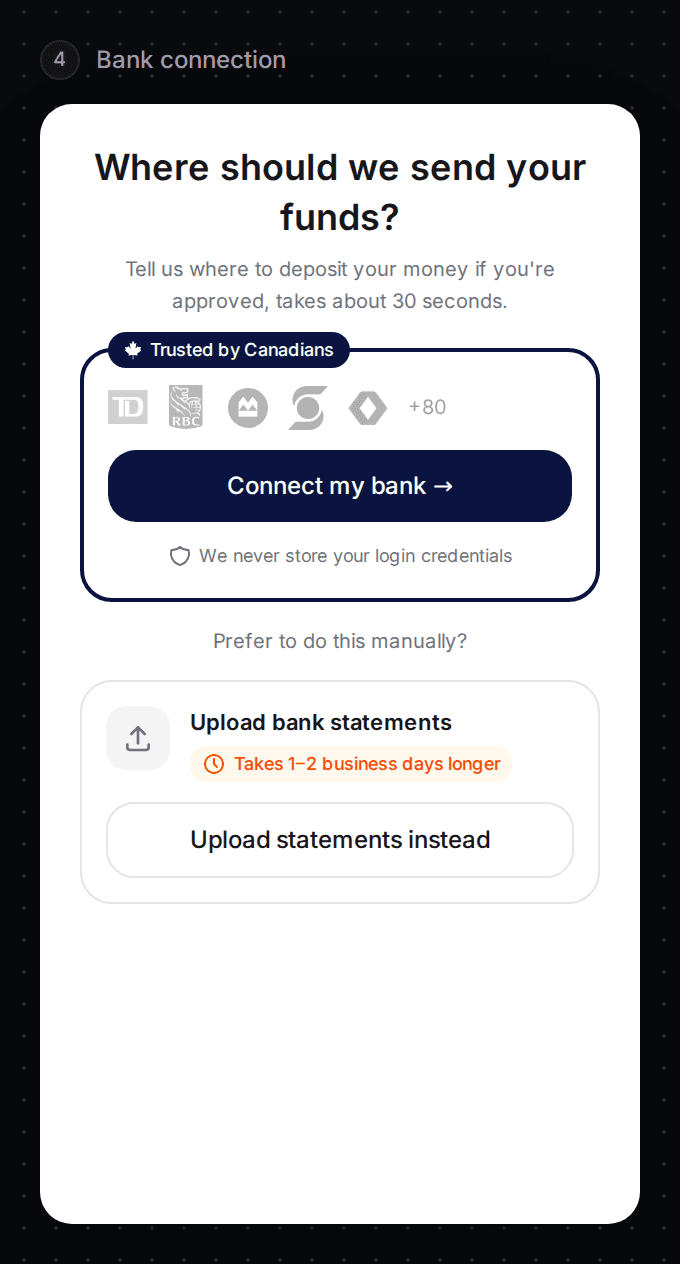
The same bank step as above. Slate uses it to set the credit limit.
5. Identity verification
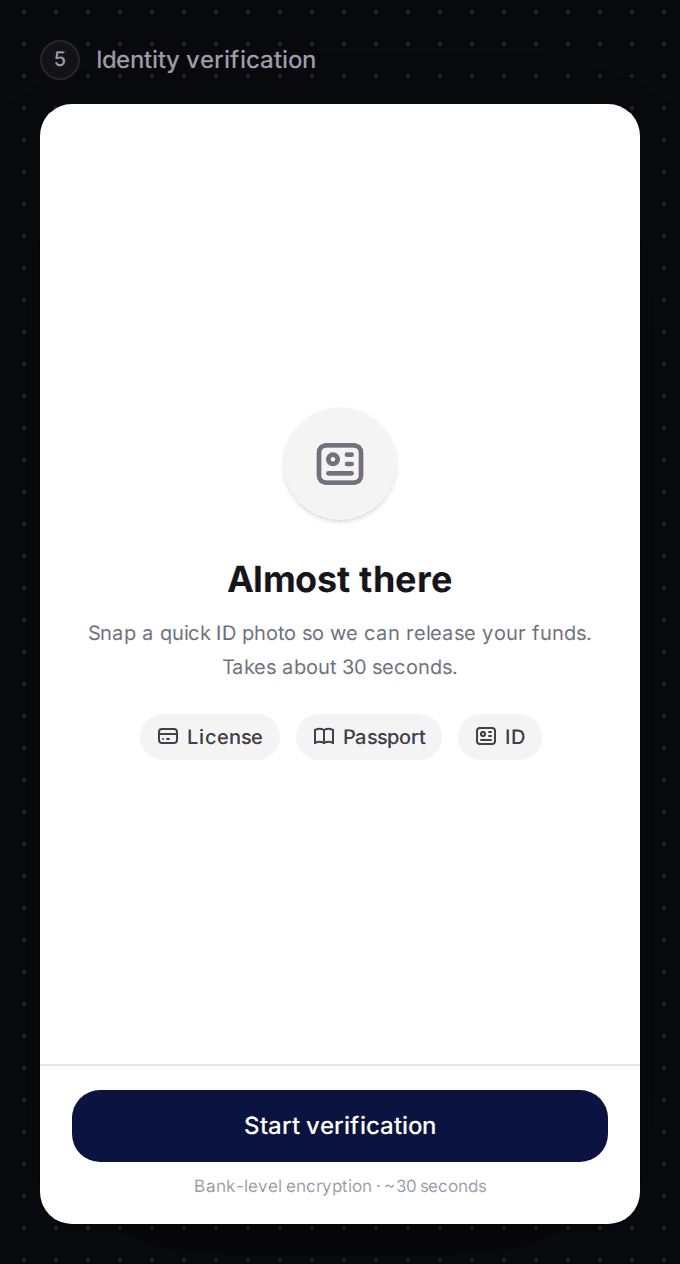
The same identity step as above.
6. Submitted
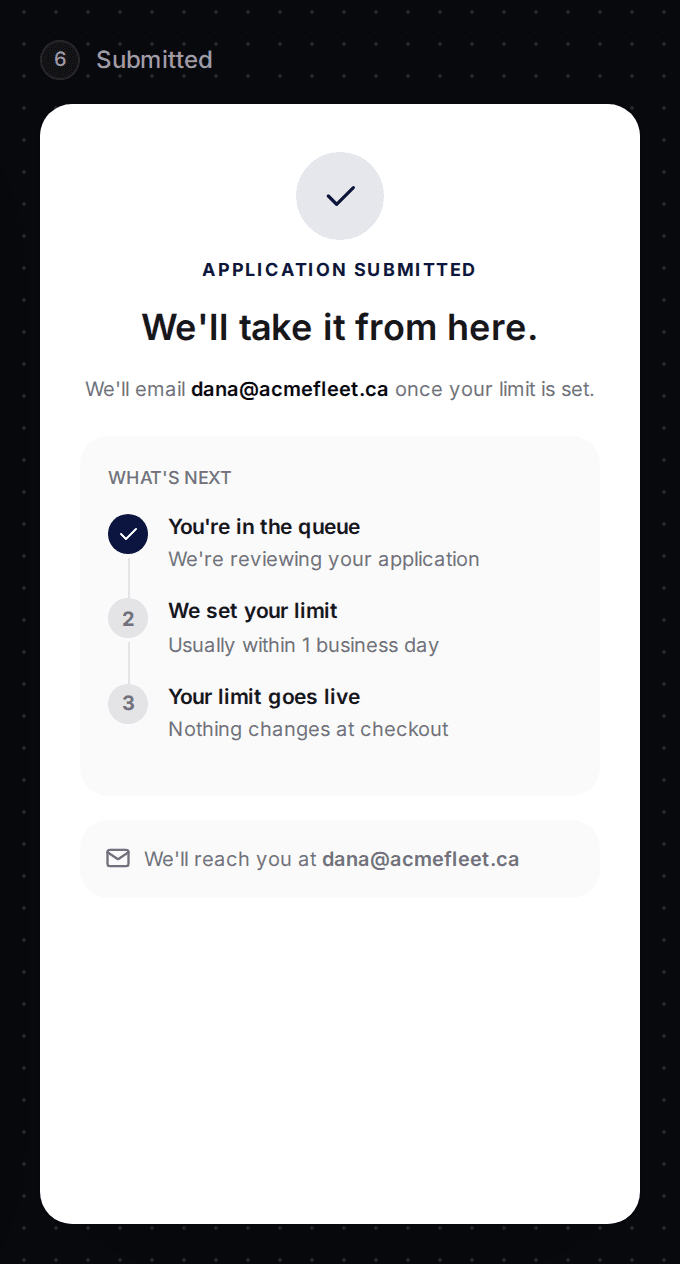
Confirms the application is in. It says Slate will email once the limit is set, then lists: you're in the queue, we set your limit, your limit goes live.
Set your logo, name and brand colour
The bottom of the right-hand column has three settings that change every version. They are the only settings on this page you can save.
Scroll to the branding settings
Scroll the right-hand column down to Logo, Display name and Brand color.
Add your logo
Select Upload and choose an image. The logo is shown on the intro screen. It must be smaller than 5 MB.
Type your display name
Type your company name in Display name.
Pick your brand colour
Select the colour square, or type a six-digit code such as #0b6e4f in the box next to it. The buttons and accents in the preview change at once.
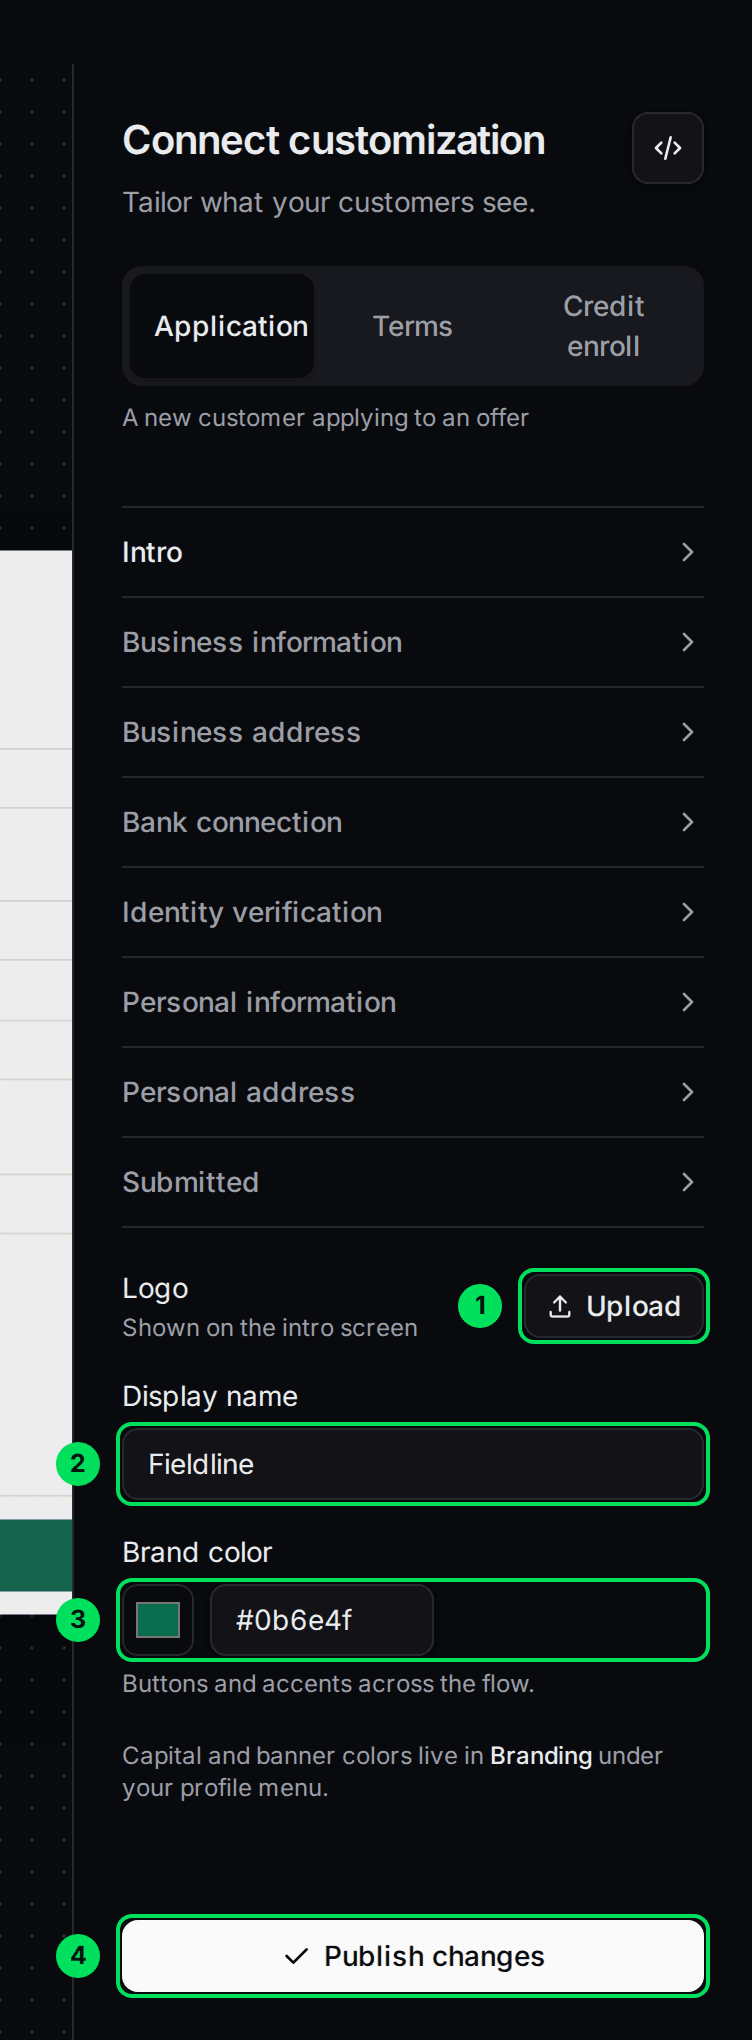
- Upload: choose your logo.
- Display name: your company name.
- Brand color: the colour square and its six-digit code.
- Publish changes: saves your logo, name and colour.
Select Publish changes
Select Publish changes. You see "Published" and "Customers see the updated application flow immediately." The button stays grey until you change something.
For more about colours and what publishing changes, see Match Slate to your brand colours.
Send it as a link or embed it
- Send a link. Open a customer in Customers and use Send link on an open offer. The customer opens the application in their browser. See Send an application link.
- Embed it. Select the
</>button and copy the code. The tag isslate-application-form. See How the products you embed work.
Two extra options exist for the embed. Add closable to show a Done button on the last screens. Add finance-request-id to open one specific request.
If something goes wrong
The Publish changes button is grey
It stays grey until you change a logo, name or colour. Change one and it turns on.
My logo won't upload
Use an image under 5 MB. If you see "File too large", pick a smaller file.
I can't find the Credit enroll version
It only appears for accounts that have Credit. A Capital-only account sees Application and Terms.
A screen says "Branding under your profile menu"
You'll see a line saying capital and banner colours live in "Branding" under your profile menu. There is no Branding item there. Use the colour settings on the product pages instead. See Match Slate to your brand colours.
Learn more about how Slate goes into your product.
Still stuck? Email [email protected] with your account email and the screen you are on. We reply within 24 business hours.