Help Center / Products you embed
How the products you embed work
Slate gives you ready-made screens you can put inside your own product. This page explains each one, when to use it, and how to add it to your site.
7 min read · Updated November 10, 2026
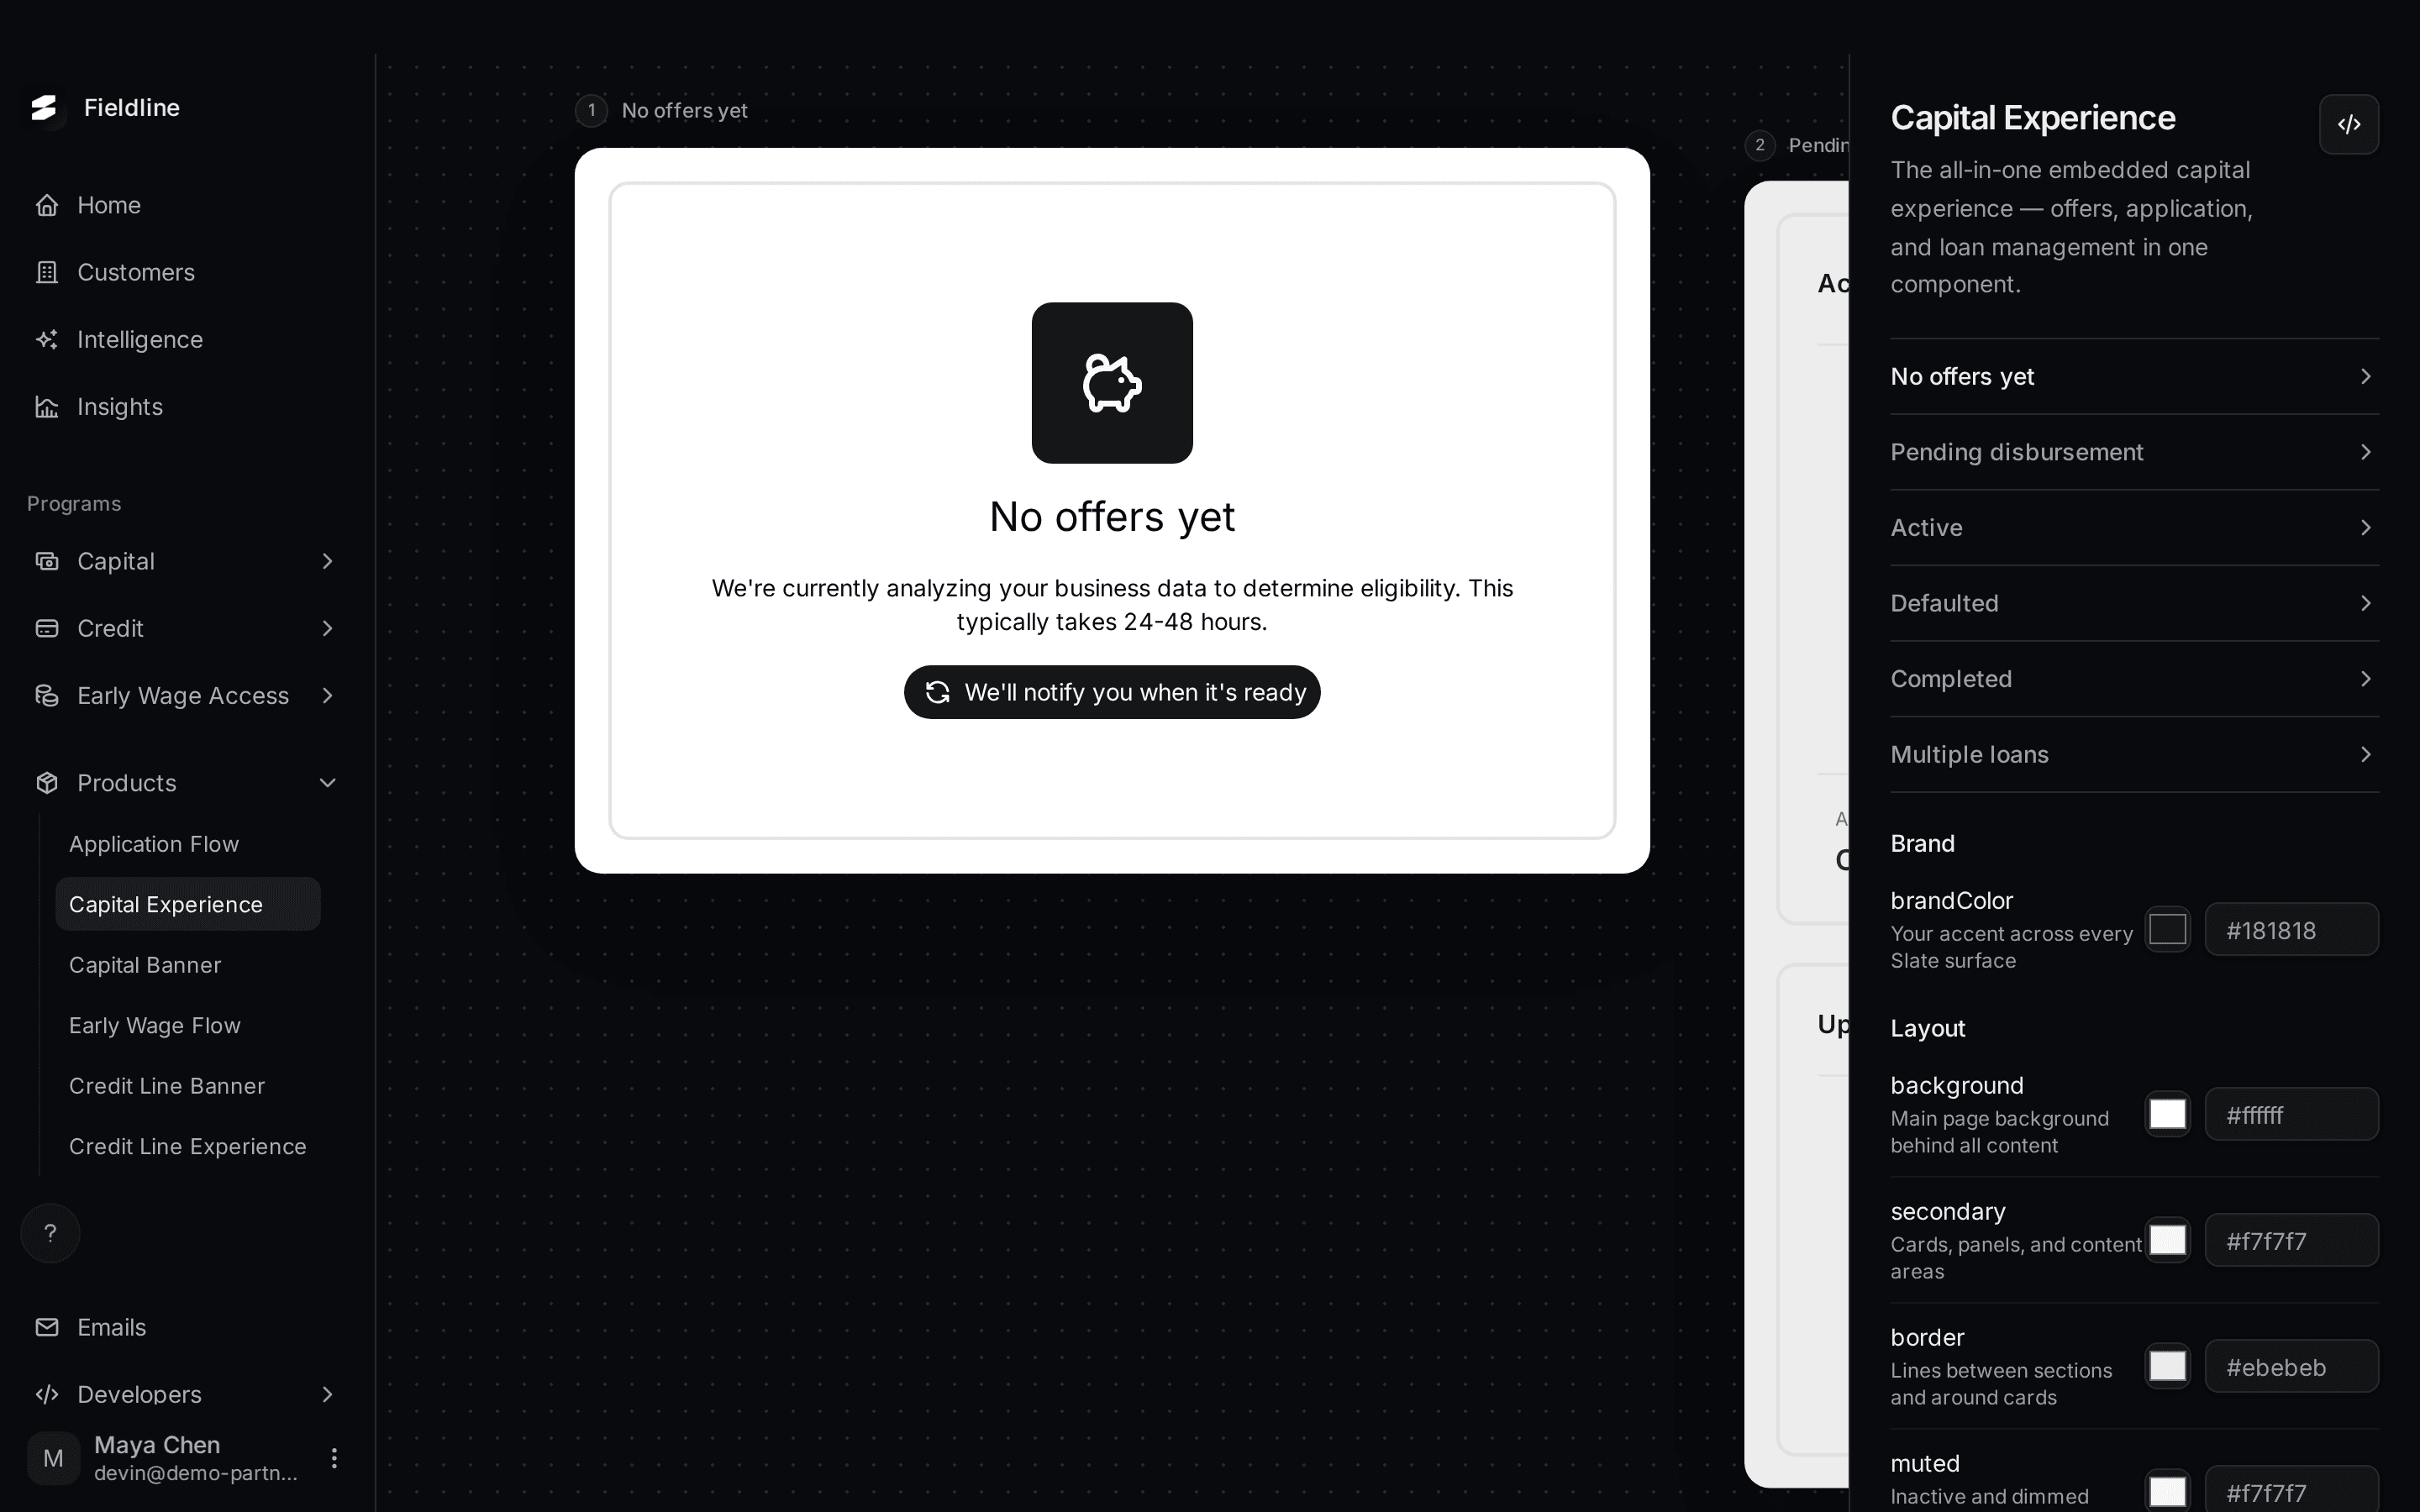
Slate gives you ready-made screens for your customers: an application, an offer banner, a dashboard of their advances and more. You preview each one in the dashboard, then your developers paste a small piece of code to show it inside your own product.
You'll find them in the menu under Products. Nothing here needs a developer until you are ready to put a screen on your site.
Which product should I use?
Pick by what you want your customer to do.
- Application Flow: the application itself. Use it to send a link (no developer needed) or to open the application from your own button. See Application Flow.
- Capital Experience: one screen for the whole journey. It shows the offer, the application and the customer's advances in one place. Use it if you want a single page for capital. See Capital Experience.
- Capital Banner: a small banner that tells the customer where they are, for example "You're approved". Use it on a page your customers already visit. See Capital Banner.
- Early Wage Flow: the application for workers who take part of their pay early. See Early Wage Flow.
- Credit Line Banner: the same idea as the Capital Banner, for a credit line. See Credit Line Banner.
- Credit Line Experience: the whole credit line journey on one screen, with the draws underneath. See Credit Line Experience.
The two Credit Line products only appear if Slate has set up a credit line for your account. The Capital products, Capital Experience, Capital Banner and Early Wage Flow, appear when Capital is on.
What does the Products page look like?
Every product page has the same layout. The left side is a preview board with real screens. The right side lists the states and the colour settings.
Open Products in the menu
Select Products in the menu on the left. Then select the product you want.
Look at the preview board
The board shows every screen or state the customer can see. Select a name in the list on the right to bring that screen to the middle.
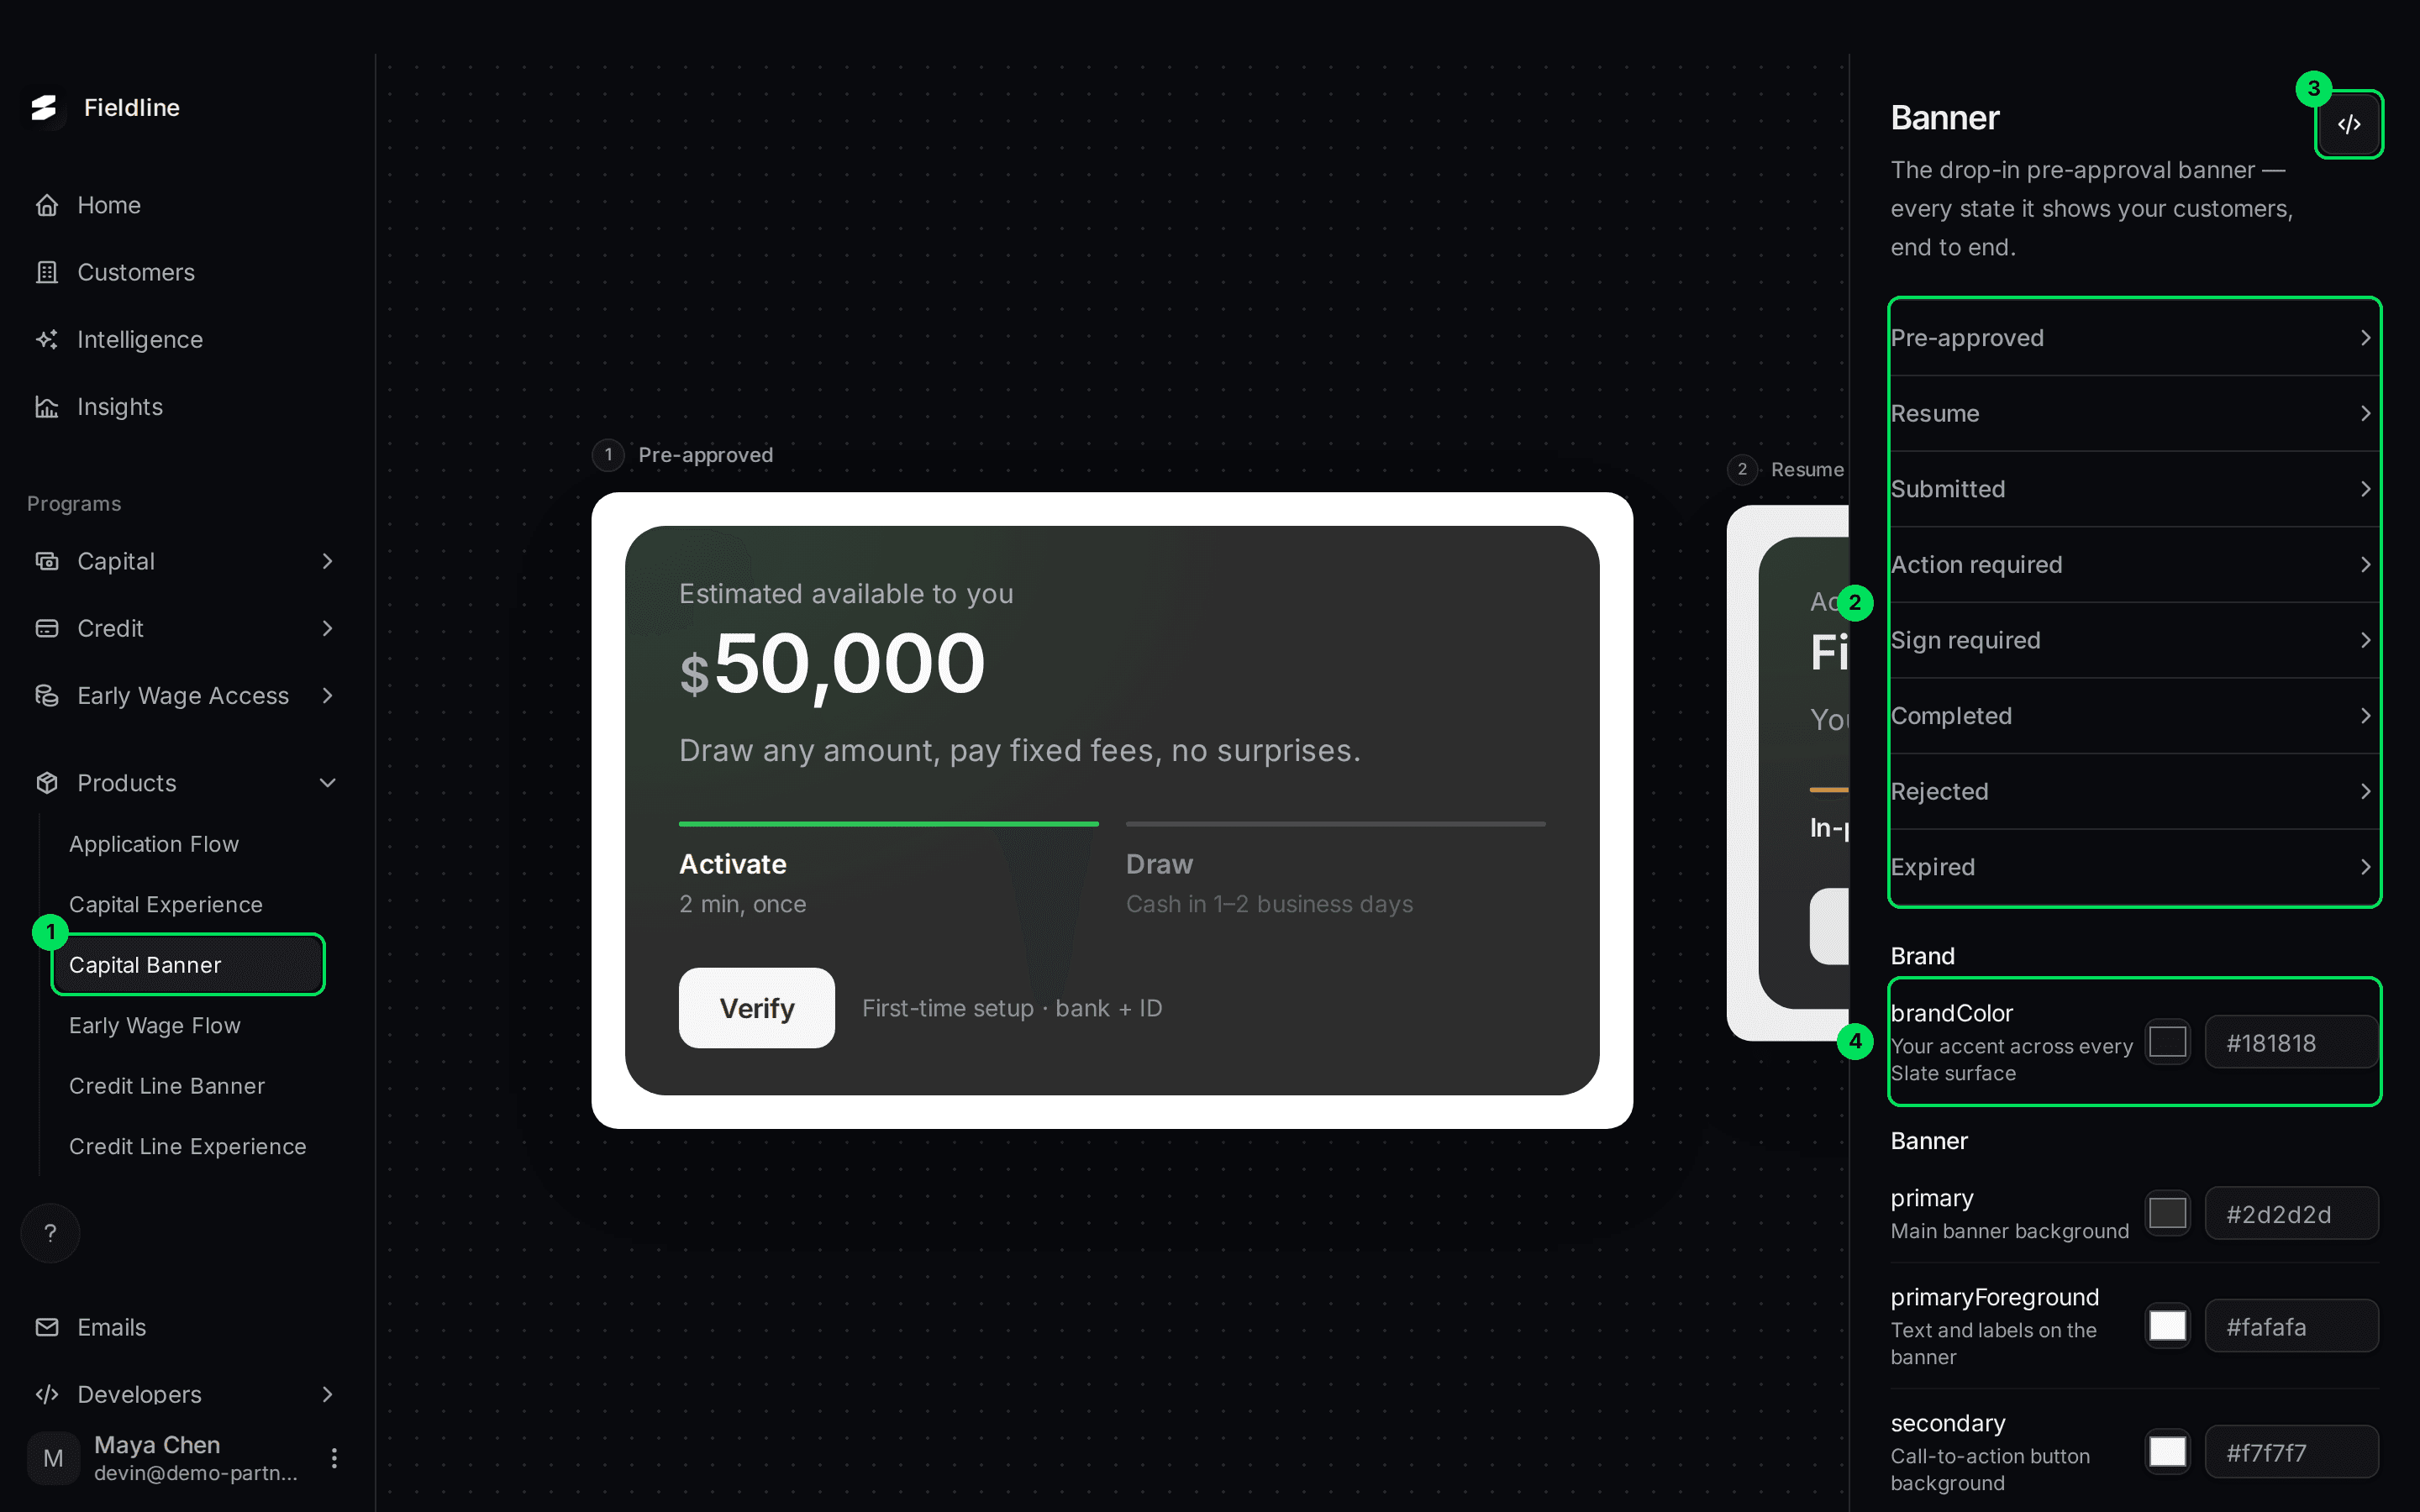
- Capital Banner: the product you opened under Products.
- The list of states. Select one to preview it.
- The Embed code button, shown as
</>. It opens the code your developers need. - The colour settings for this product. See Match Slate to your brand colours.
How does embedding work?
There are two parts. Both are short.
- Your server asks Slate for a session token. A token is a pass for one customer. It lets that customer's screen load, and nothing else. Your server asks for it with your API key, which is a password your developers use so your systems can talk to Slate.
- Your page loads Slate's component and hands it the token. The component then shows the right screen for that customer.
Your API key must stay on your server. Never put it in a web page. A token is safe for the browser because it only works for one customer, and it expires. By default a token lasts about one day.
You need an API key first. See API keys.
Step 1: ask for a token (your server)
Send a POST request to /user-session-token. Put your API key in the x-api-key header. Send your own ID for the customer as externalId. This is the same ID you gave Slate when you added the customer.
// Run this on your server, once for each customer who opens the page
const response = await fetch("https://api-sandbox.tryslatehq.com/user-session-token", {
  method: "POST",
  headers: {
    "x-api-key": process.env.SLATE_API_KEY,
    "Content-Type": "application/json",
  },
  body: JSON.stringify({ externalId: "cus_123" }),
});

const { token } = await response.json();
Use https://api-sandbox.tryslatehq.com while you test and https://api.tryslatehq.com when you are live. The sandbox and live environments have separate API keys.
Step 2: show the component (your page)
Add Slate's script once. Then add the component for your product and pass it the token.
<script async type="module" src="https://components.tryslatehq.com/slate.esm.js"></script>

<slate-capital env="sandbox" user-token="TOKEN_FROM_YOUR_SERVER"></slate-capital>
envissandboxwhile you test andlivewhen you go live. It must be exactly one of those two words.user-tokenis the token from step 1. Without it, nothing loads.- The component picks up your saved logo and colours by itself. You don't pass them.
The tag name changes by product:
- Application Flow and Early Wage Flow:
slate-application-form - Capital Experience and Credit Line Experience:
slate-capital - Capital Banner:
slate-pre-approval-banner-v2 - Credit Line Banner:
slate-credit-line-banner
Copy the code from the dashboard
You don't have to write the snippets yourself. Each product page has the code ready, with the right tag and options for that product.
Open the product page
Select Products, then the product you want to embed.
Select the Embed code button
Select the </> button at the top of the right-hand column. A panel slides in from the right.
Read the three sections
The panel has up to three sections. Section 1 is the token request for your server. Section 2 is the component for your page. Section 3 shows how to listen for events, where the product has them.
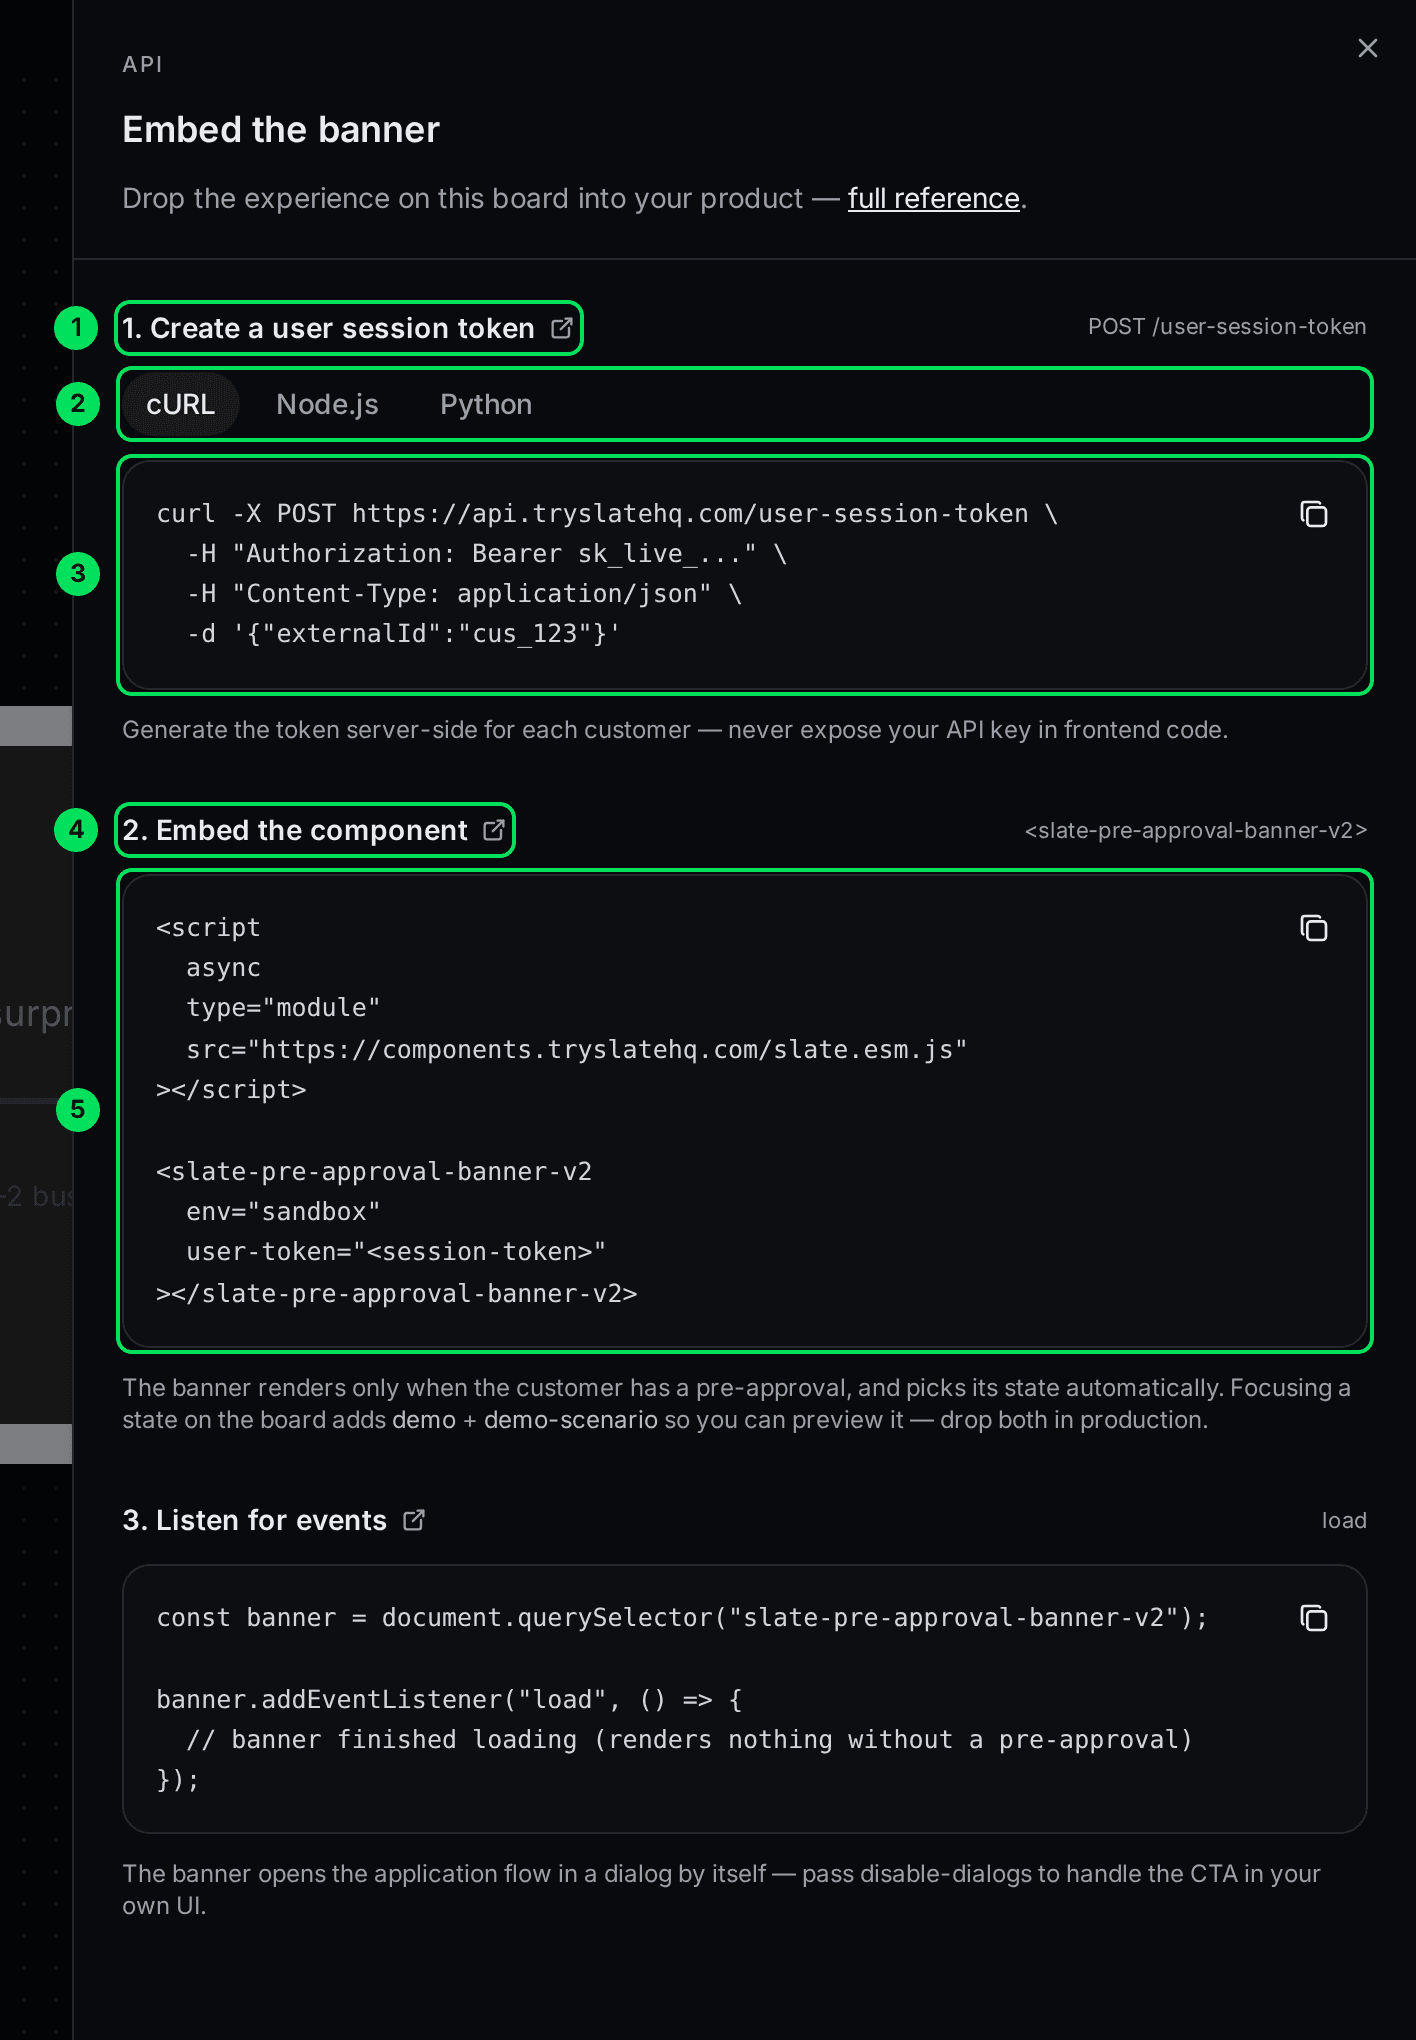
- The first section: create a user session token.
- The cURL, Node.js and Python tabs. Pick the language your server uses.
- The token code. Select the copy icon in the corner of the block to copy it.
- The second section: embed the component.
- The component code. Copy it into your page.
Send the code to your developer
Copy each block and send it to your developer. Tell them to use the x-api-key header, as described above.
Listen for events
Some components tell your page when something happens, so you can react in your own product.
- load: the component has finished loading. The banners show nothing at all if the customer has no offer.
- submit: the customer finished the application. It includes the application ID.
- dismiss: the customer pressed Done. Add
closableto the component to show that button. - ctaClicked: the customer pressed the banner's button. Use it together with
disable-dialogsif you want to open the next screen yourself.
If something goes wrong
The banner shows nothing
The banners are silent when there is nothing to show. The customer may have no offer yet, or the offer may be for a credit line (use the Credit Line Banner for those). Check the customer's offers in Capital > Offers.
Nothing loads at all
Check that user-token is set and env is exactly sandbox or live. Use a token from the same environment as env.
The component says "Something went wrong"
The token may have expired. Ask your server for a fresh one and reload the page.
The ID check needs the camera
The application opens inside a frame on your page. The page that shows it must allow camera access, or customers can't finish the ID step.
Learn more about how Slate goes into your product.
Still stuck? Email [email protected] with your account email and the screen you are on. We reply within 24 business hours.